The CLI (Command Line Interface)
Learning Objectives
- Define and explain the strengths and weaknesses of GUIs and CLIs
- Learn how to access the terminal and break down its components
- Describe the file system and how it relates to the CLI
- Introduce common commands and list unsafe ones
- Learn how to find more information on using commands
Framing
The majority of our interactions with computers is through a graphical user interface, or a GUI. A GUI is a great tool -- it adds a level of user experience that allowed computers to become more popular and mainstream.
The Command Line Interface (CLI) is a text-based way of interacting with your computer, that gives you more abilities than a GUI has, but with a higher learning curve.
The CLI works by typing commands (running programs) into a terminal and the computer executes those commands or gives you a fairly descriptive error regarding why it did not work.
While the GUI is perfect for the average computer user, there are drawbacks for users like us. The CLI offers many benefits:
-
Power/Speed. Most tasks can be completed faster with the cli. Features like tab completion, command history (hitting the up arrow in your terminal), and piping contribute to this.
-
Precision. Each command does only one thing and we can read them and understand what they do before we run them.
-
Repeatability / Scriptability. These commands can be saved and reused by others. What you did during Installfest was run a script that we shared with you!
-
Tools. There are a lot of open source tools that you can use on the cli, you can install them with cli package managers like Advanced Packaging Tool (apt) on Linux or Homebrew on MacOS. Because each tool does one specific thing, it is possible to chain multiple tools together to automate processes.
-
Debugging. The errors are better, the errors that you get from a GUI can be unhelpful while cli errors are generally more thought out and descriptive.
CLI Basics
The Terminal and the Shell
How do we access this text-based interface from our GUI desktop? We run what's
called a terminal application (also often referred to as a terminal emulator).
The default on OSX is Terminal.app. When you open a new Terminal window, the
Terminal app will call a program called a shell.
A shell is a program that takes commands, passes them to the operating system and returns any output or errors. The default shell used by terminal is called Bash or ZSH on MacOS Catalina or later. There are other shells but all operate very similarly.
Let's fire up our terminals and get exploring!
Open Terminal
⌘ (Command) + Space, or open Spotlight- type "Terminal"
Enter

- Keep it locked in your dock. Right click on the icon, highlight options, check "Keep in Dock".

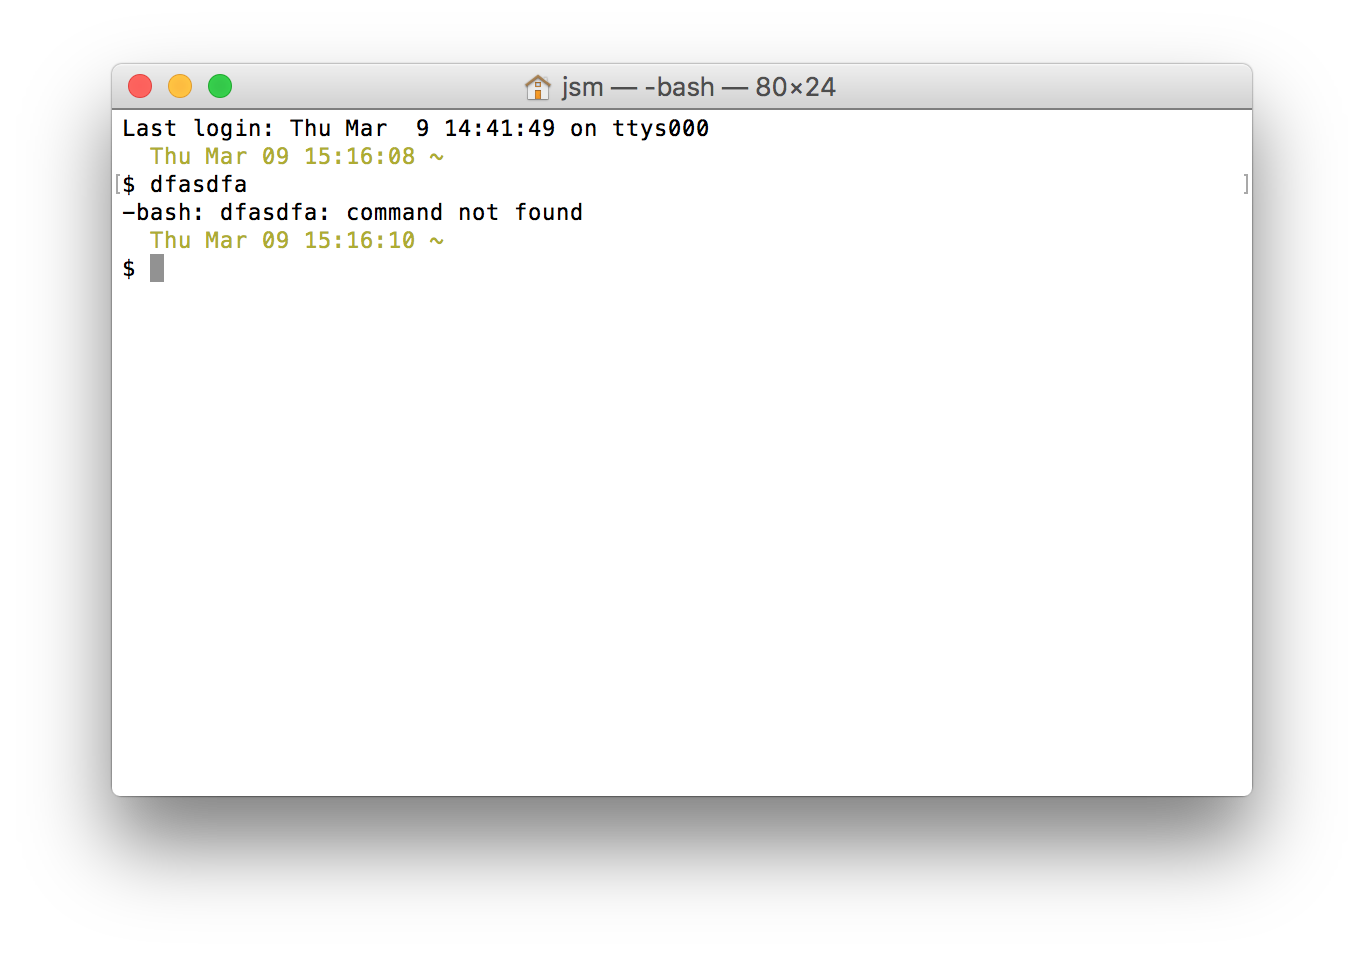
You should see something like the following prompt:

When Terminal launches, it will start in your computer's home directory
(whatever you named your computer). Your home directory is denoted by the tilde
~.
The prompt is the shell asking for input; when you see $ <something> in
documentation, it generally means, input this command into a shell.
If you have a terminal open but do not see a prompt, that means that the shell is not ready to receive input.
Typing a random string of characters and hitting enter will produce a message
-bash: <your-random-string>: command not found
What is a command?
A command is a program. Some come built into the shell and provide the basics for interacting with the operating system and some are written by programmers (like you!) to provide further functionality.
Basic Commands
Print working directory: pwd
pwd will print the current working directory. It shows you a path. This
path shows you where you are currently located in the filesystem. It's like
sending up a flare or homing beacon, where you can see how far you have
'traveled' from the root directory.

You can think of a path as being similar to an address. There are two types of paths: absolute and relative.
Absolute vs Relative
A relative path is similar to giving someone directions to a destination from their current location. Where is General Assembly? Two blocks up 15th street from where you are now.
An example of an absolute path to General Assembly could be 1133 15th St NW, 8th Floor, Washington, DC 20005 or a longitude and latitude(38.9048728, -77.0340283).
An absolute path is comparable to giving someone the direct location from a universally known starting point. On the command line that known starting point is the root directory.
List: ls
ls- Lists the contents of the current directory. You can see:- the immediate child directories (the directories inside this directory)
- the files in this directory

Bash commands can take flags or options denoted by a dash -
ls -a- list content including hidden files and directories. Hidden files and directories begin with a period, for example,.git.ls -l- list content and give meta information about each item
Directories (folders) can have directories within them, and there can be directories inside those directories, ad infinitum. This creates a tree structure where directories can have many children with many different branches.
sei
  ├── homework
  ├── labs
  ├── lessons
  │   └── cli_intro.md
  ├── morning_exercises
  |-- projects
  └── sandbox
Change Directory: cd
We can navigate to other directories relative to the current working directory.
cd some_directory- navigates into a child directory called
some_directory.some_directoryis a child of the current directory.
- navigates into a child directory called
cd ..- navigates into the parent of the current directory
..is shorthand for parent
cdorcd ~will take you back home
Create Files & Folders from Terminal
Now that we can navigate the file system, let's learn how to create, modify, and delete files and folders.
Make Directory: mkdir
- Makes a directory (folder) in a location relative to the current directory
- Example:
mkdir directory_name- makes a directory called 'directory_name'`
Create File: touch
- creates an empty file in a location relative to the current directory
- A file typically will have a file extension like
.txtwhereas a directory will not. - Example:
touch file.txt- makes a .txt file
View File: cat
- Writes the contents of a file to the console
- This is a quick method to check the contents of a file without opening it in an editor
- Example:
cat readme.md- writes the contents of readme.md to the console
Remove: rm
- Deletes a file with no confirmation
- There is no
trashto recover removed files from so use with caution.
Remove Directory: rmdir
- Deletes a directory. Similarly to
rm, no confirmation or trash to recover from, so proceed cautiously.
Super user do: sudo
sudo -- or "super user do" -- runs the command that follows as the super user
(i.e., 'root' or 'admin'). That means your computer will not prevent you from
running the command and may not even confirm if this is what you actually want
to do. This is of particular concern when the command may have destructive
effects.
Generally, you shouldn't need to run commands with
sudoin this course. If you're not sure, ask an instructor.
Flags
In the rm -rf command, the letters r and f are flags. Flags are extra
options you can optionally add to commands. They modify the behavior of the
command.
In the rm -rf example, there are two flags
-r: recursive, delete all nested files and directories-f: force, ignore permissions and do not ask for confirmation
Man Pages
Each command has a different set of flags and arguments it accepts. We can easily view this information without leaving our terminal environment using a command.
The man command, short for manual, allows us to view a manual page for any
installed command.
For example, you can run man rm to view the list of flags that the rm
command accepts.
Since man is also a command, you can even run man man to view more details
about the man command.
CLI Shortcuts
In the long term, reduce your reliance on the mouse. Some CLI keyboard shortcuts:
-
⌘KClear the Terminal window -
option arrowMove cursor by word -
letterTAB
- autocompletes (case-sensitive)
-
up / down arrow
- cycle command history
You do: Create SEI Environment (5 minutes)
To get your hands dirty, use the commands above to build out the following folders and files. This will be where you store all your work from SEI.
sei
  ├── homework
  ├── labs
  ├── lessons
  │   └── cli_intro.md
  ├── morning_exercises
  |-- projects
  └── sandbox
Pro Tip: Use brackets to substitute paths together. Lets say you want to
create a markdown file (extension .md) for a couple of lessons. One way to do
this would be to run the commands one-by-one:
touch lessons/cli_intro.md
touch lessons/git_intro.md
touch lessons/html.md
touch lessons/css.md
That would absolutely work, but you could make do it in one command:
touch lessons/cli_intro.md lessons/git_intro.md lessons/html.md lessons/css.md
That would also work, but we can make it a more succinct command by using substitution:
touch lessons/{cli_intro,git_intro,html,css}.md
The above command will create the same set of files, but in one short command. It also works with directories! The list of file or directories must be separated by commas with no spaces.
Time to Practice
There are MANY more CLI commands to learn, more than we could cover in an entire day. There are two "cheatsheets" linked in this repo here and here that are good references for CLI.
Throughout this course, you'll find that the best way to learn a new skill is to gain a foothold in the topic, then wrestle with the material on your own and with the support your teammates and instructors to deepen your understanding.
Labs give us the opportunity to do so, and they will almost always ask you to look up how to do things we didn't cover in the lecture. This is intentional and will help grow your meta-developer skills -- belief in your ability to learn new things and teach yourself, as well as improving your ability to Google and sift through resources like MDN, W3 Schools, and Stack Overflow.
Closing
The commands we've covered in this lesson will probably account for 80% of your CLI usage. Regardless of how much experience with the command line you have coming in to this class, your next step should be to get really comfortable with it - we're going to spend a lot of time in the command line over the next 12 weeks.
Additional Practice / Bonus Material
More Terminal Keyboard shortcuts
Reduce your reliance on the mouse and get in the habit of using these keyboard shortcuts:
⌘ K Clear the Terminal window
option arrow Move cursor by word
Ctrl A Go to beginning of line
Ctrl E Go to end of line
Ctrl K Kill line to end
Ctrl U Kill line to beginning
Ctrl Y Paste whatever was killed using Ctrl+K or Ctrl+U
cd - toggle previous directory
There are also video tutorials here.
For those on Powershell
| Description | Bash | PowerShell |
|---|---|---|
| List files and folders | ls | ls |
| Change directory | cd | cd |
| Show Working directory | pwd | pwd |
| Make New directory | mkdir | mkdir |
| Clear the Screen | clear | clear |
| To copy a file | cp | cp |
| To remove or delete a file | rm | rm |
| To create a New text file | touch | New-Item |
| To view a file | cat | cat |