Create an Atlas Hosted MongoDB
Create an Atlas Account
The most popular service for hosting MongoDB databases, not surprisingly, is MongoDB's own Atlas. We'll use it to host all of our MongoDB databases in class.
First, you will need to sign up for a free account here.

If you want to create an account without using Sign up with Google:
- Provide the required information. You should store this username and password somewhere easily accessible and secure (like a password manager).
- Read the Terms of Service and Privacy Policy, then agree to them.
- Finally select the Create your Atlas account option.
If instead you would like to use Sign up with Google, select the Sign up with Google button.
If You Did Not Sign Up with Google
If you used Sign up with Google, skip to the next section. If you created an account without using Sign up with Google, you'll be taken to a page asking you to verify your email, as shown below.
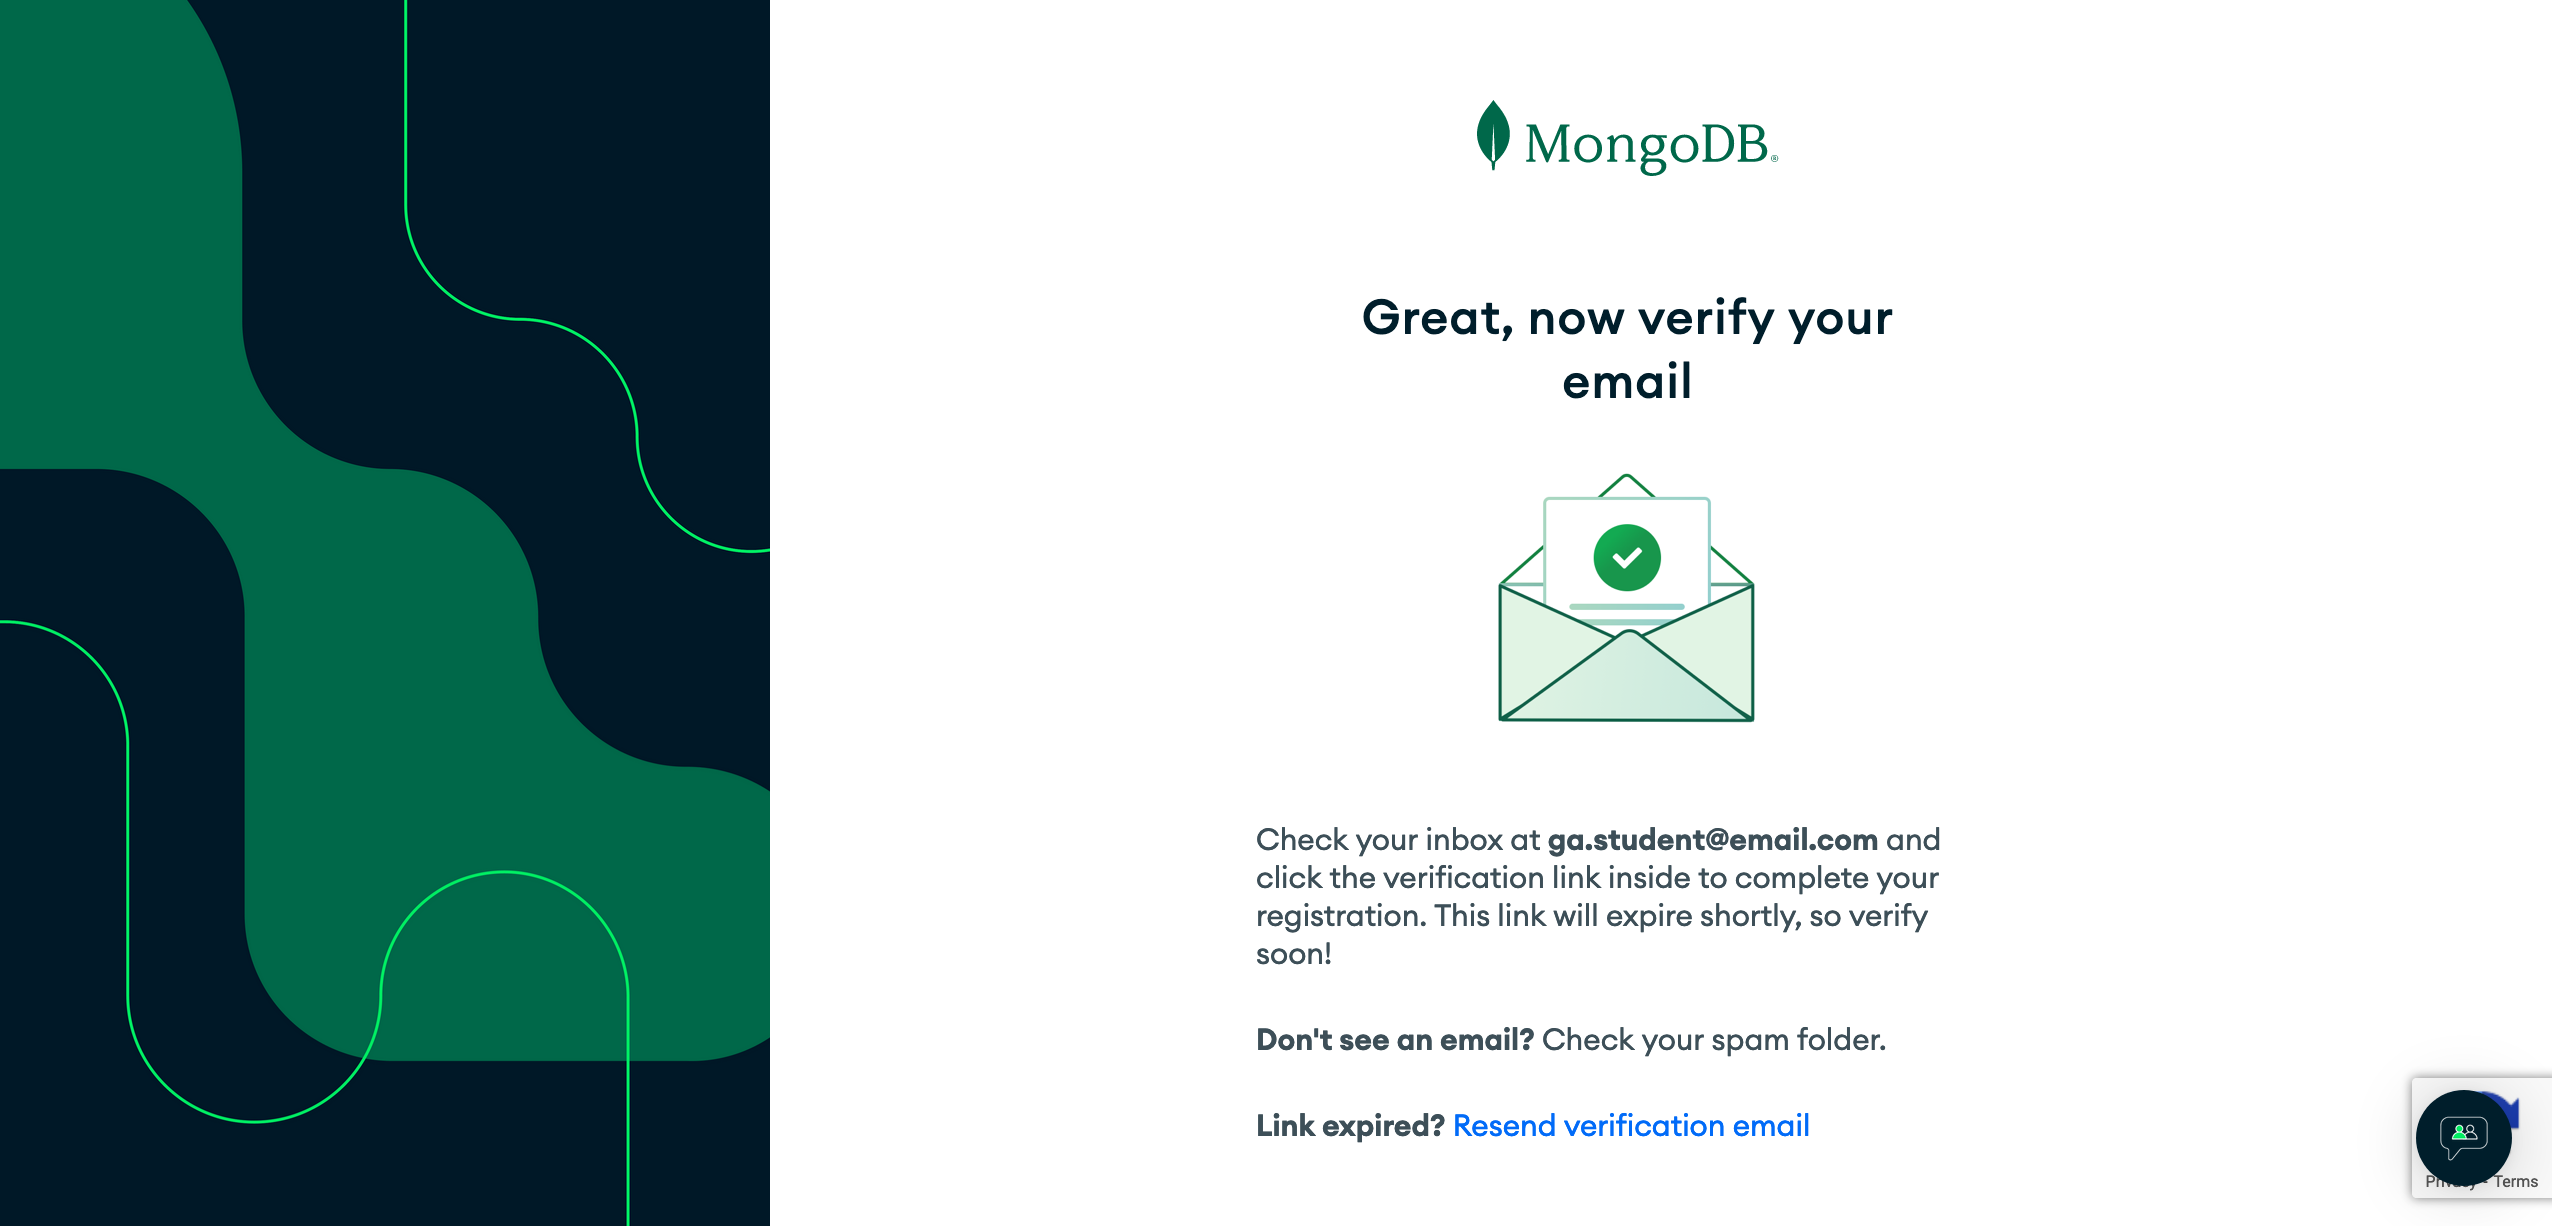
Find the email from MongoDB in your inbox and verify your email. After you've verified your email, you'll be taken to a page informing you that you've successfully verified your email and a Continue button. Click the Continue button. Skip to the Welcome to Atlas section below.
If You Did Sign Up with Google
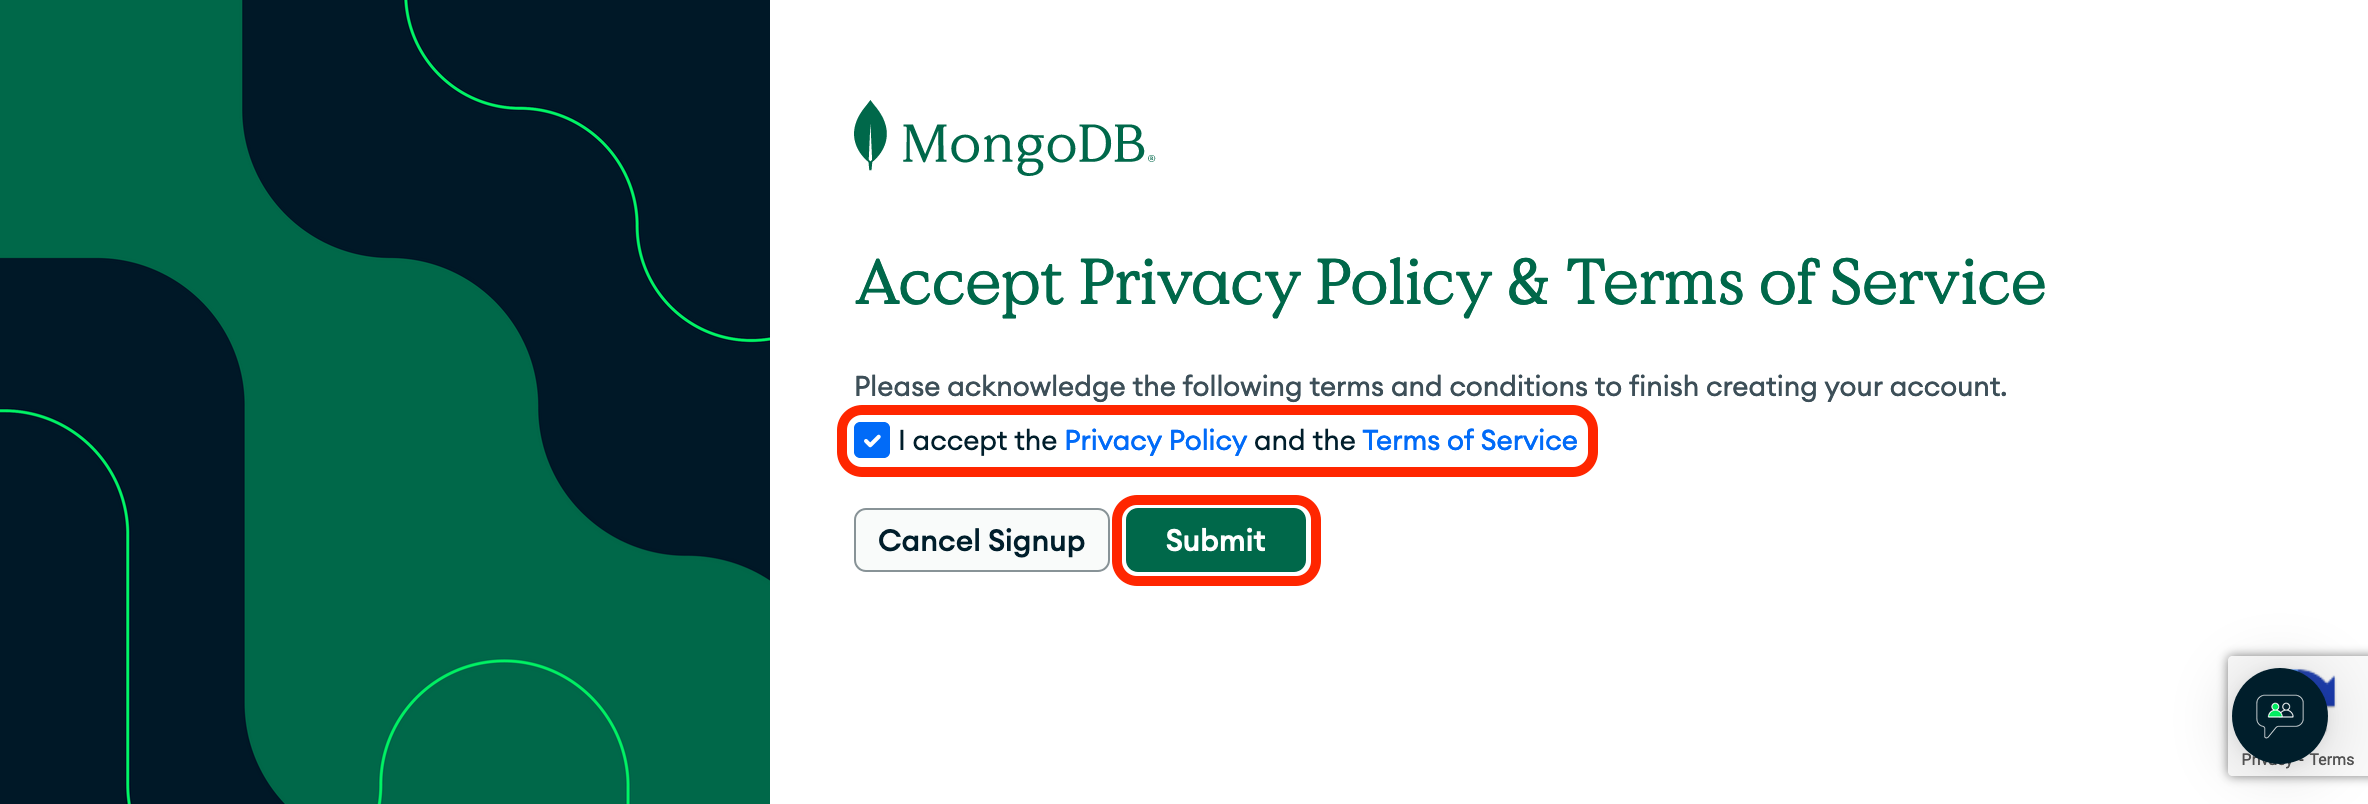
Read the Terms of Service and Privacy Policy, then agree to them. Select the Submit button.
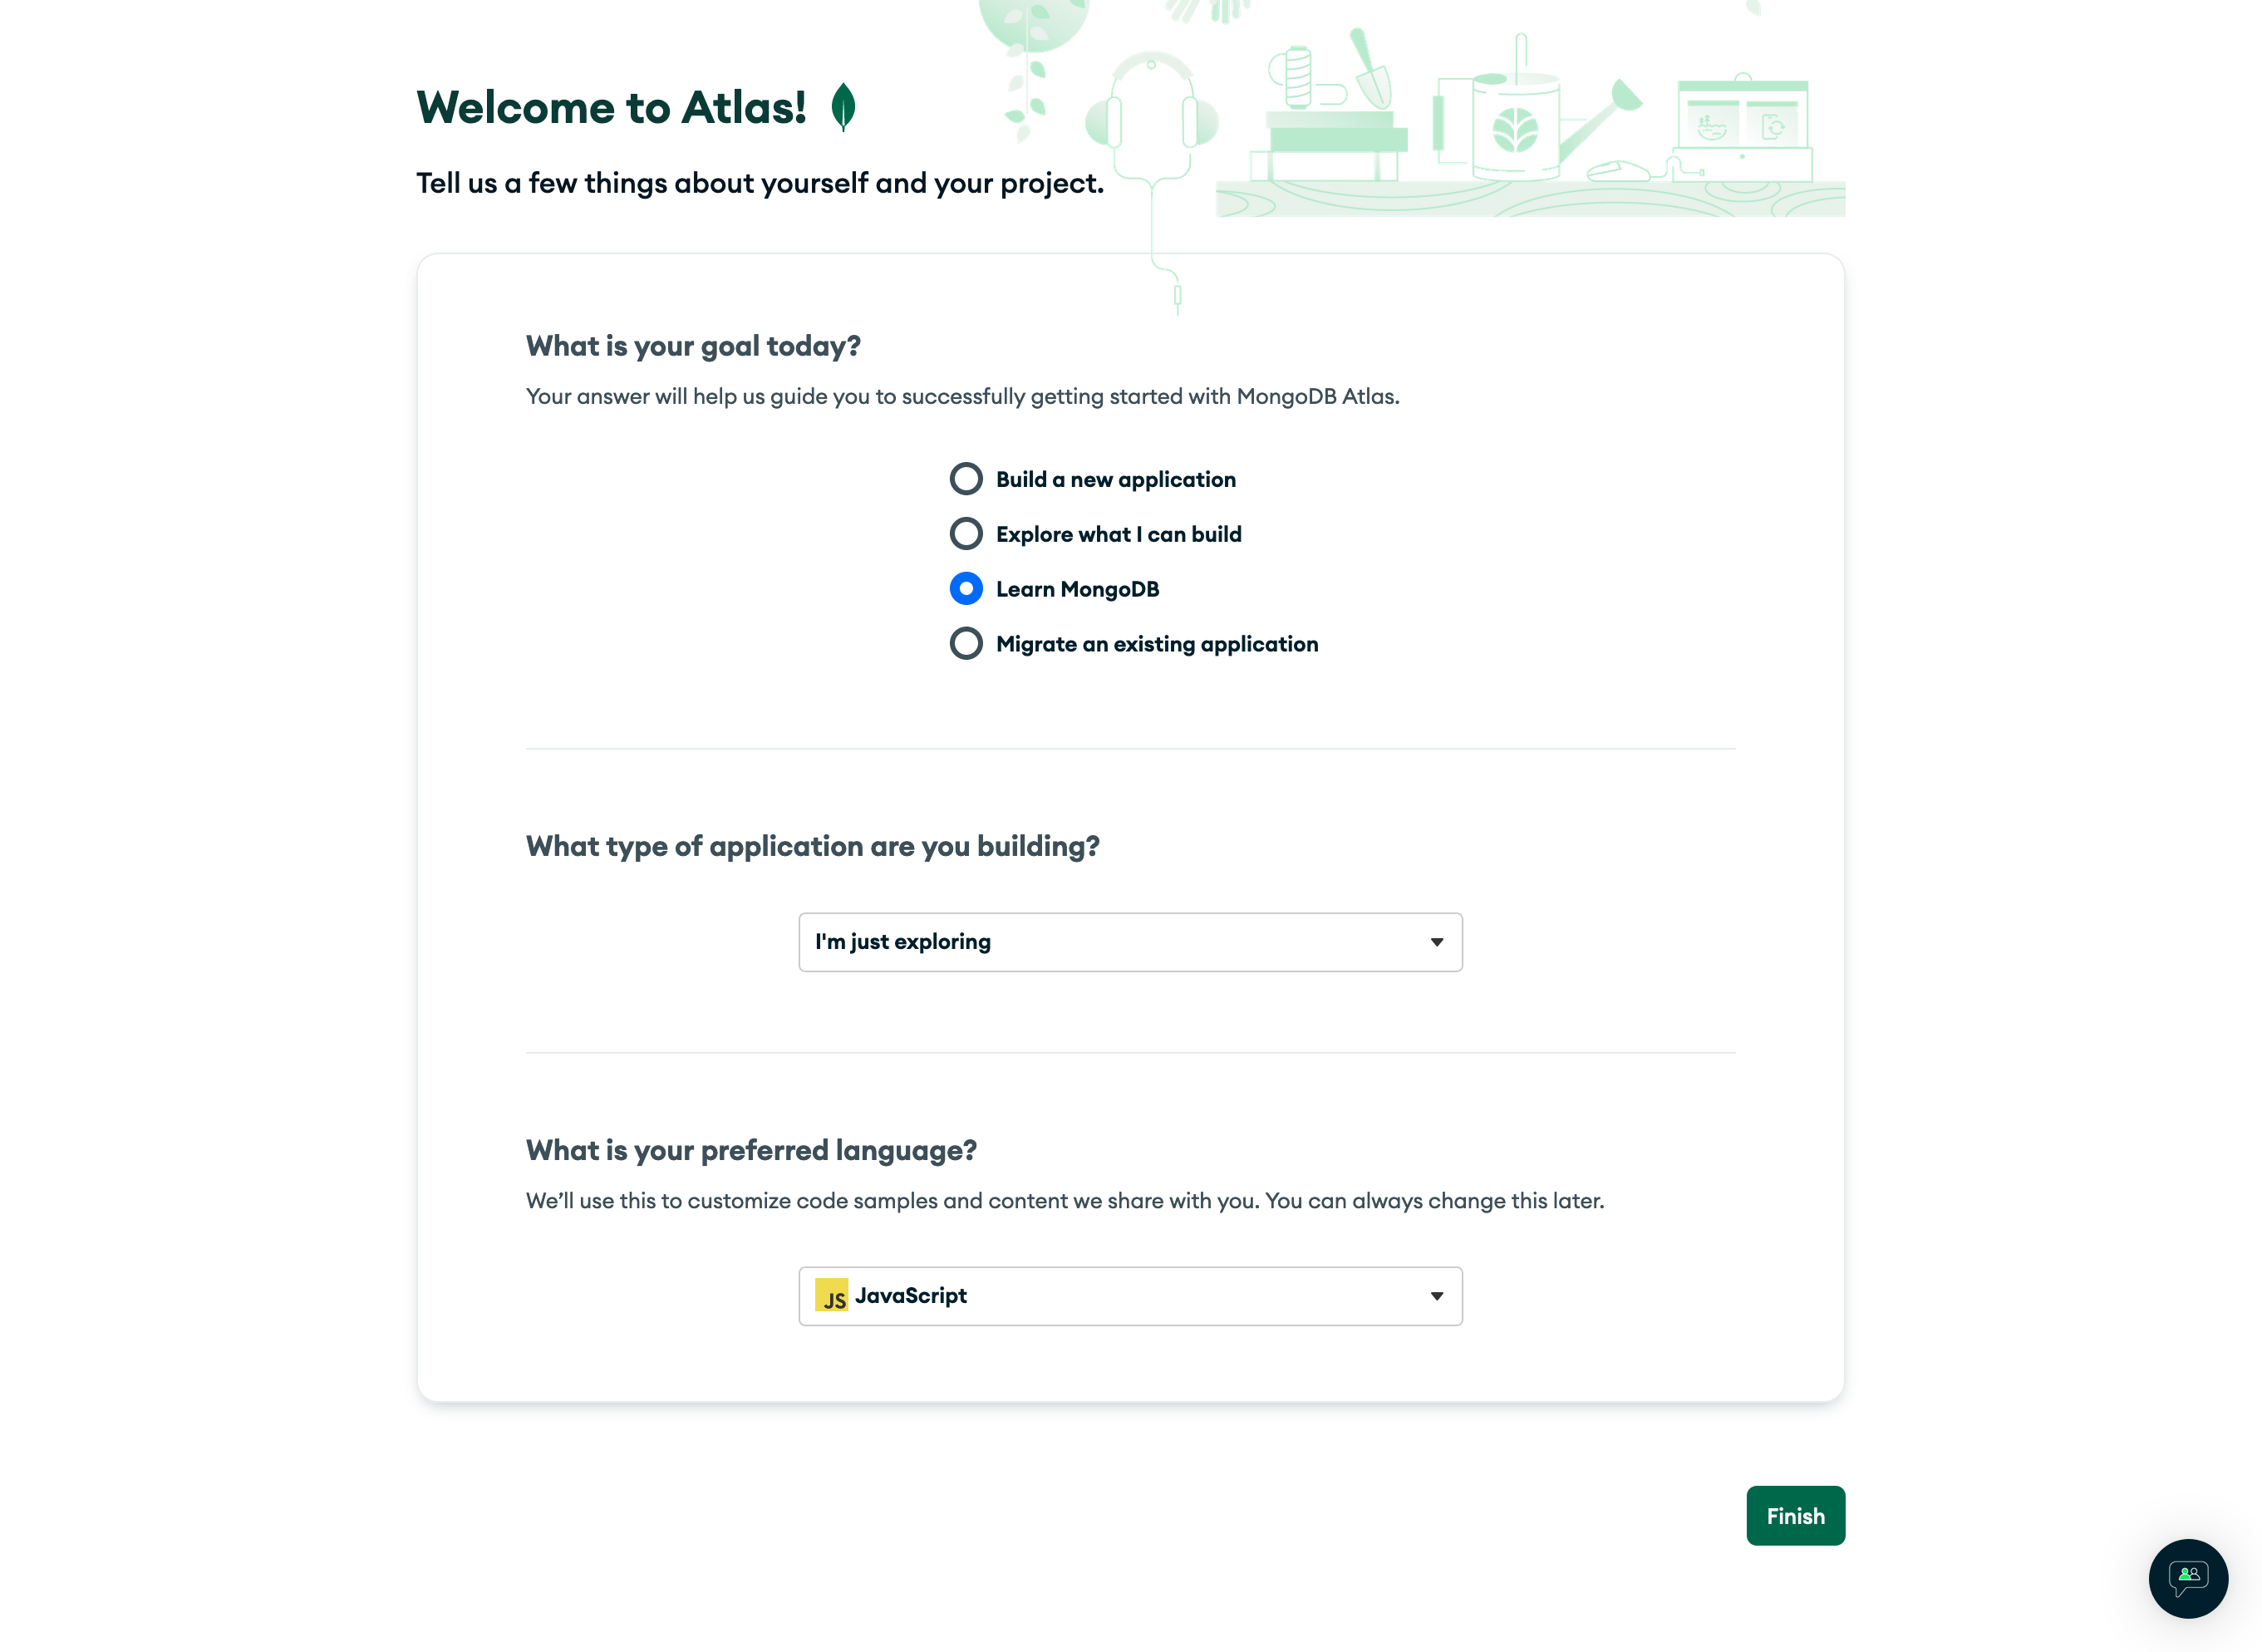
Welcome to Atlas
Answer the marketing questions however you'd like. Some suggestions are shown below, but your selections do not impact your experience. Select the Finish button when you're done.
Deploy Your Database
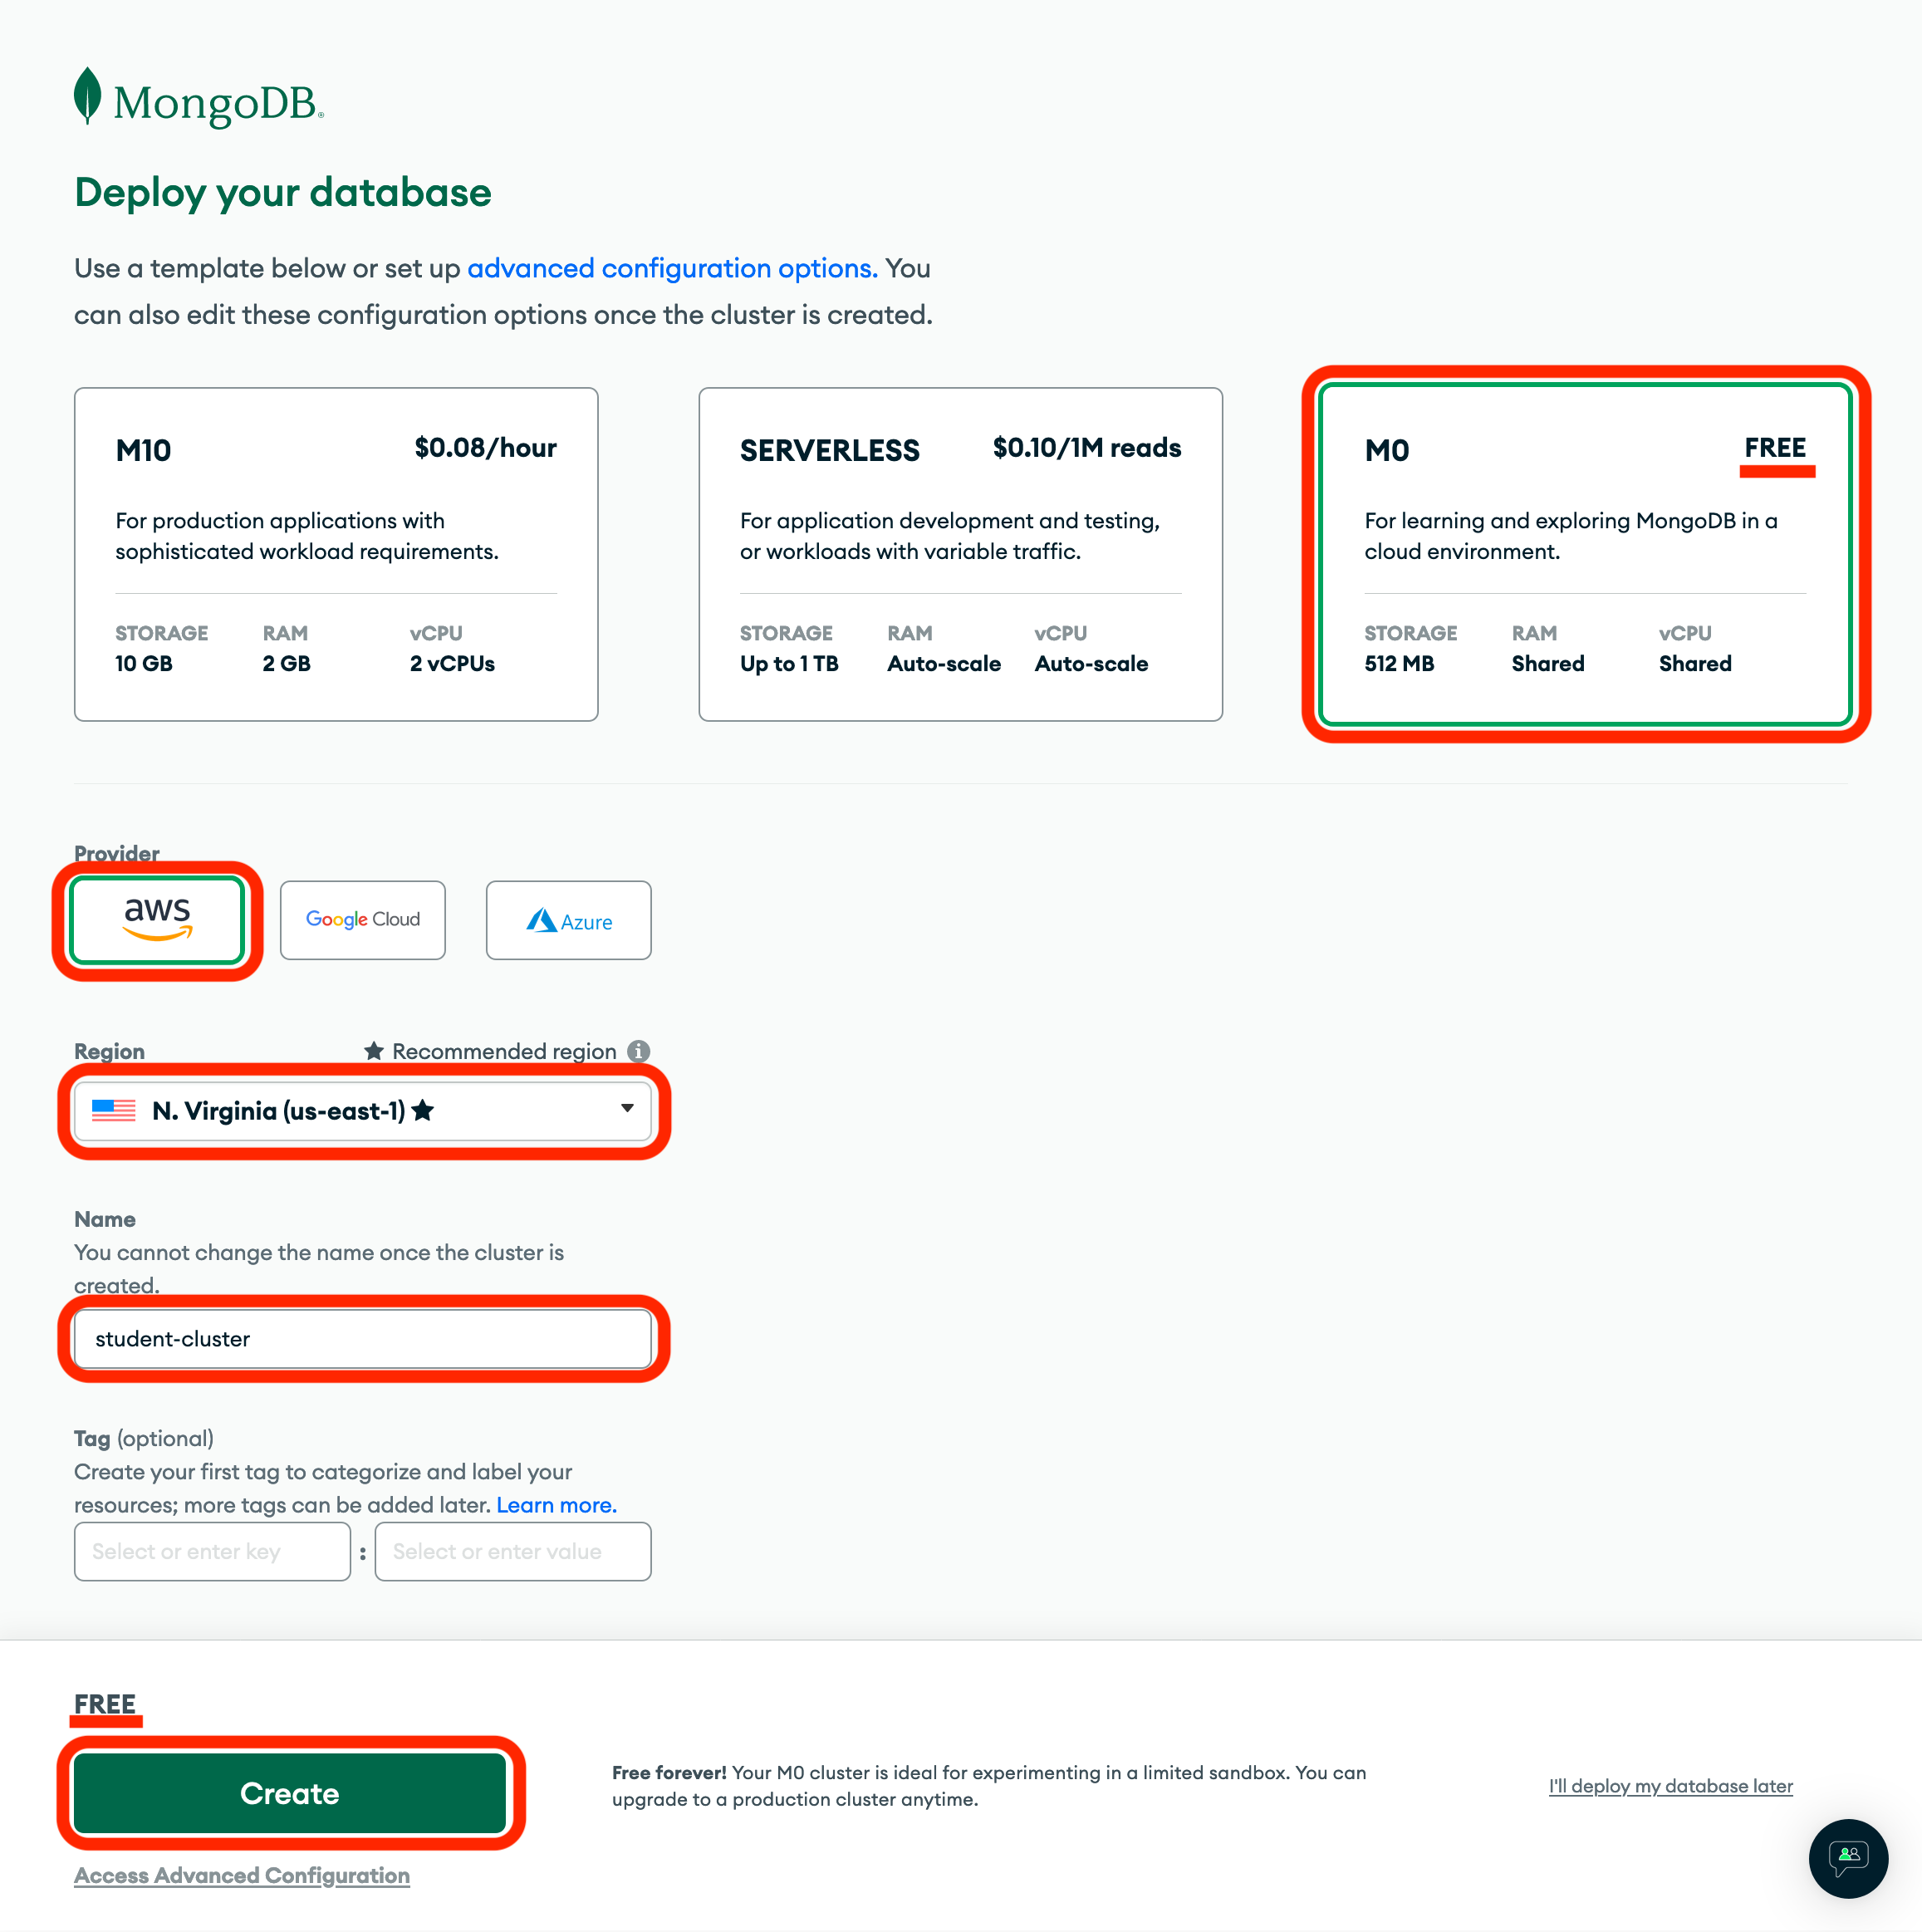
It's time to set up the cluster! Clusters are MongoDB's way of collecting your databases all in one place. Select the M0 option, which is FREE. Select AWS as the Provider, and select the Region closest to your job market. Name your cluster whatever you want, but know that this name cannot be changed later. Ensure that the text directly above the Create button says FREE. Do not select the Create button unless this text says FREE. If it has a dollar amount, review your selections and ensure you have correctly configured the service from this page. Finally, select the Create button.
Security Quickstart
You will be taken to a Security Quickstart page. There will be a message at the bottom left stating that the database cluster is being provisioned, along with the approximate amount of time it will take to complete.
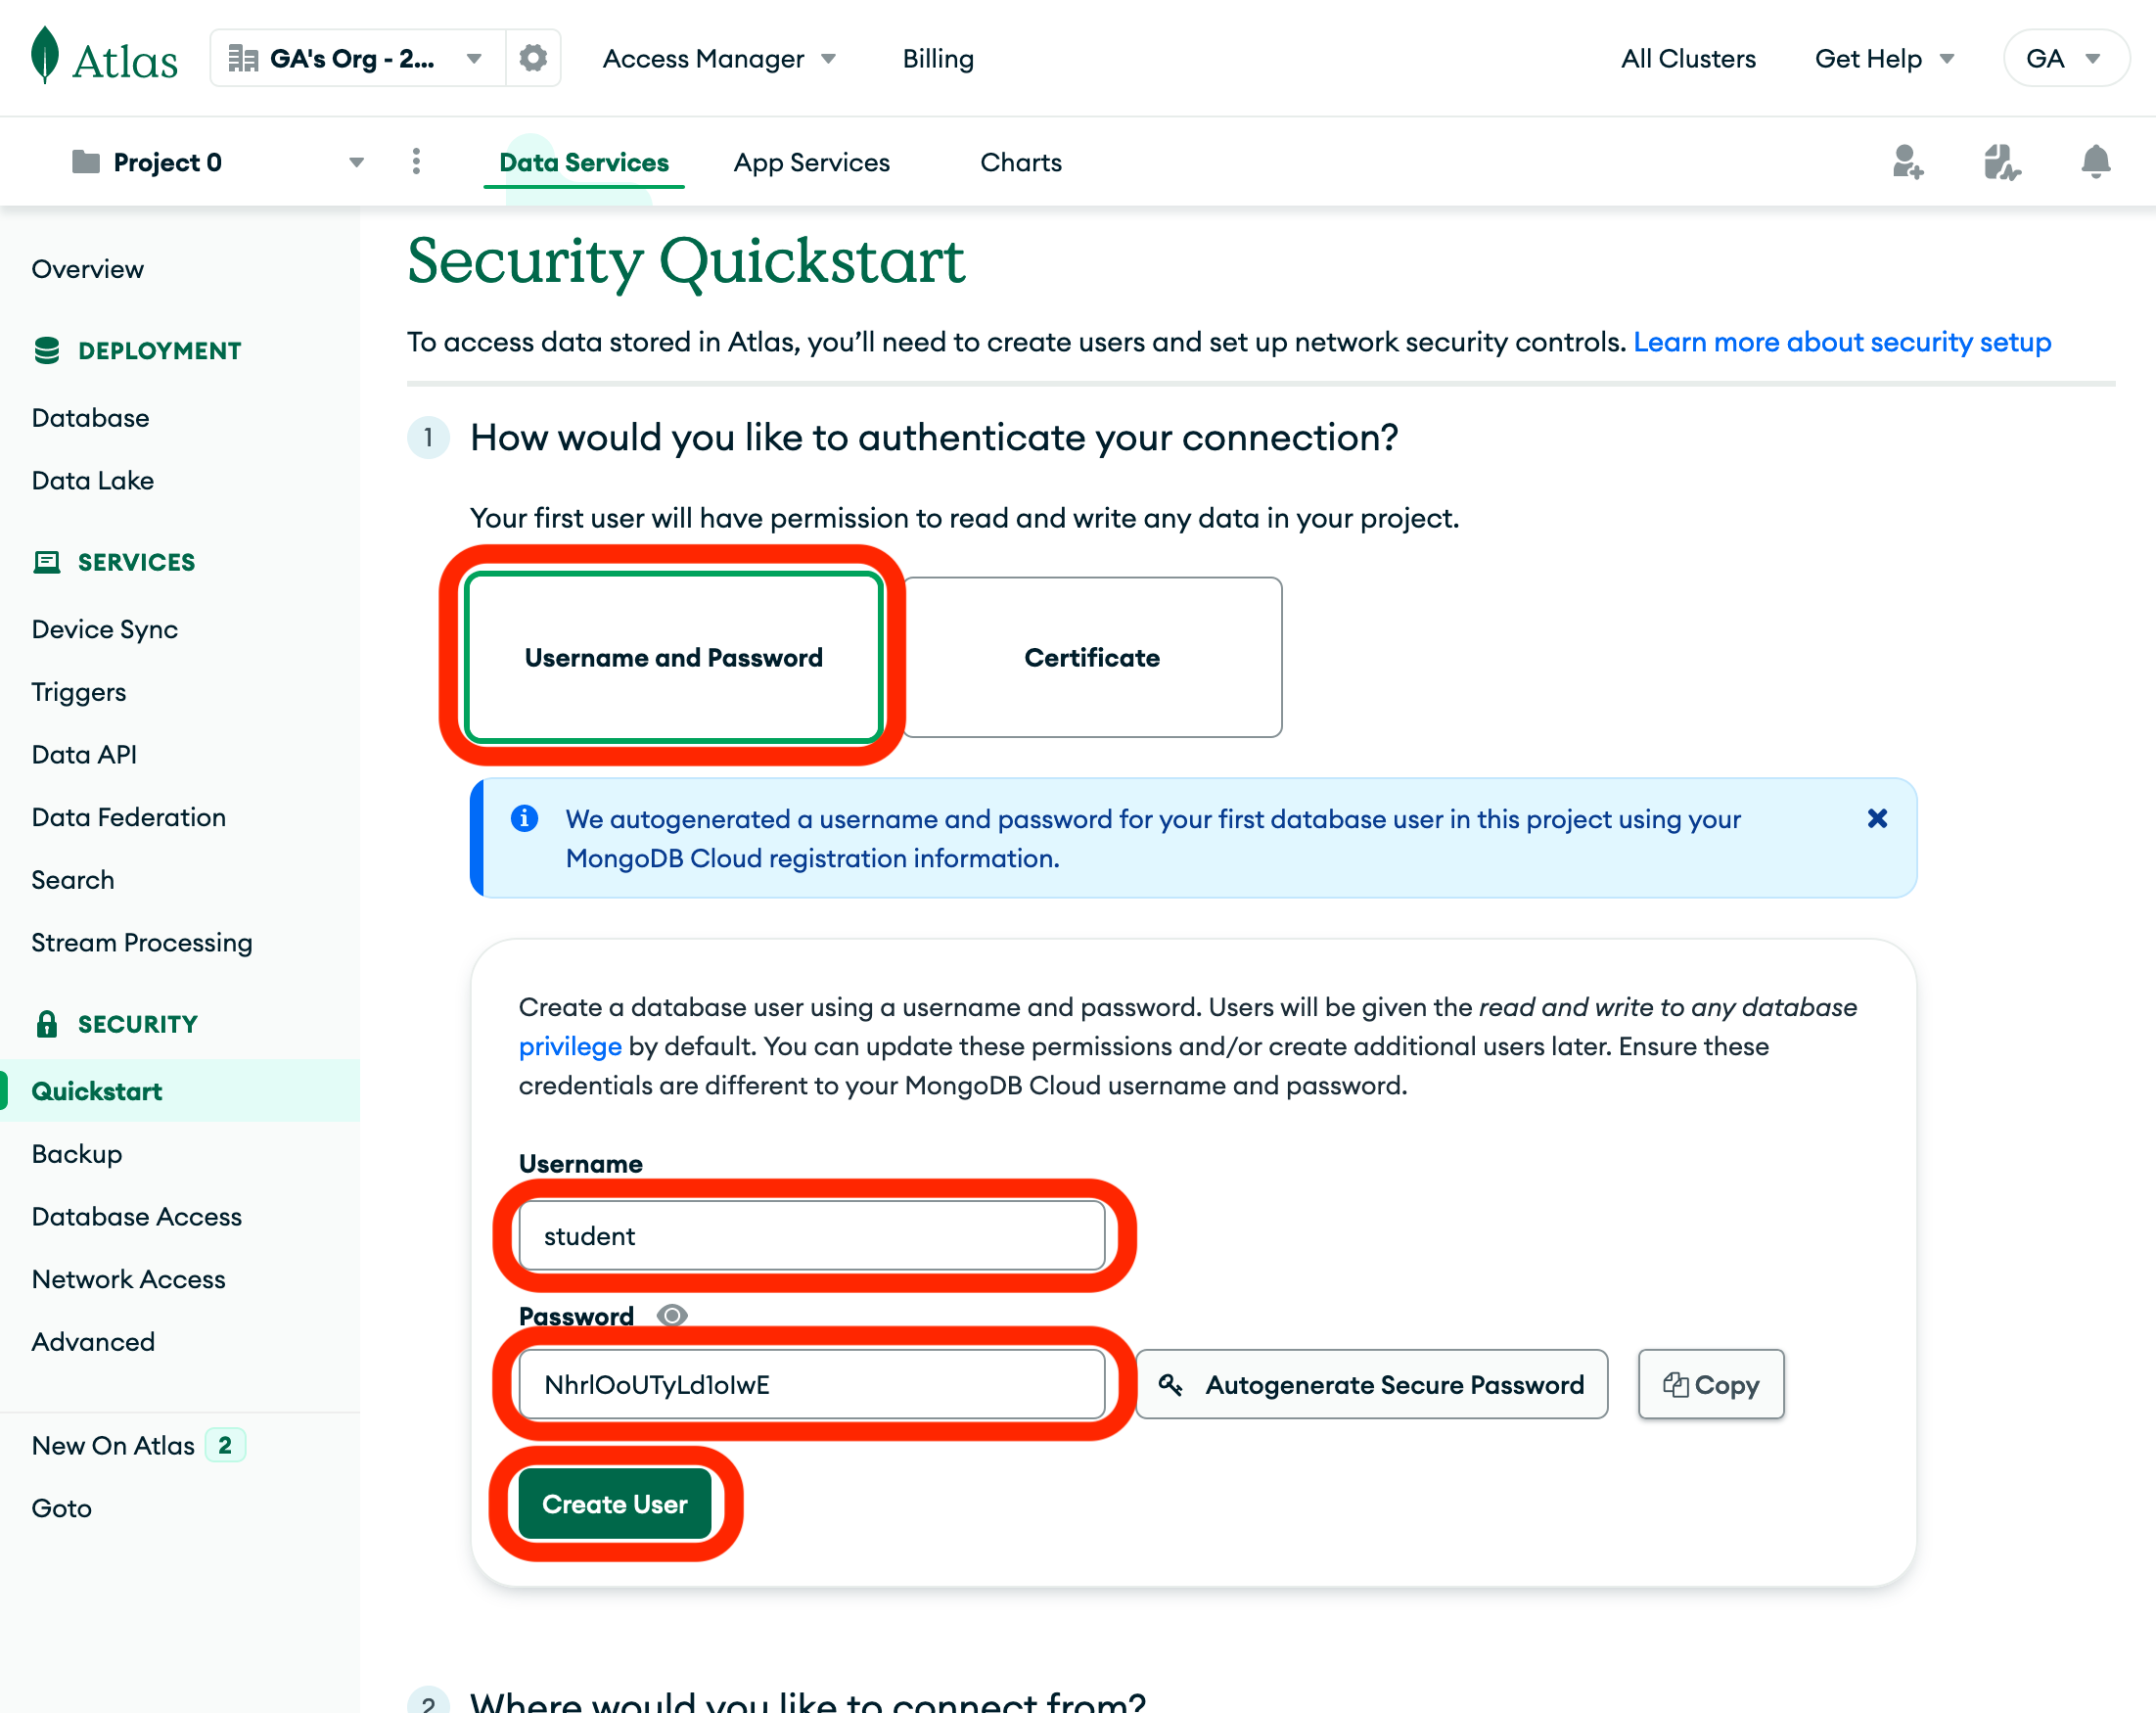
While the cluster is provisioned, create a database user (different from your account user) by following the steps in the How would you like to authenticate your connection section.
The database user's credentials you create now must be embedded in the connection string used to connect to the database, which you will retrieve soon.
Select a username and password. The username and password must be alphanumeric. They cannot contain any characters that are not English letters or numbers. Do not use special characters of any kind, including spaces. Feel free to use the Autogenerate Secure Password option if you would like or use the default selections; it will only build passwords that meet this constraint. It is vital that you store this username and password somewhere easily accessible and secure (like a password manager). Use the provided Copy button to ensure you have an exact copy of your chosen password. You are going to need access to this information soon. After you have selected a username and password, select Create User.
The page should look like this after this step:
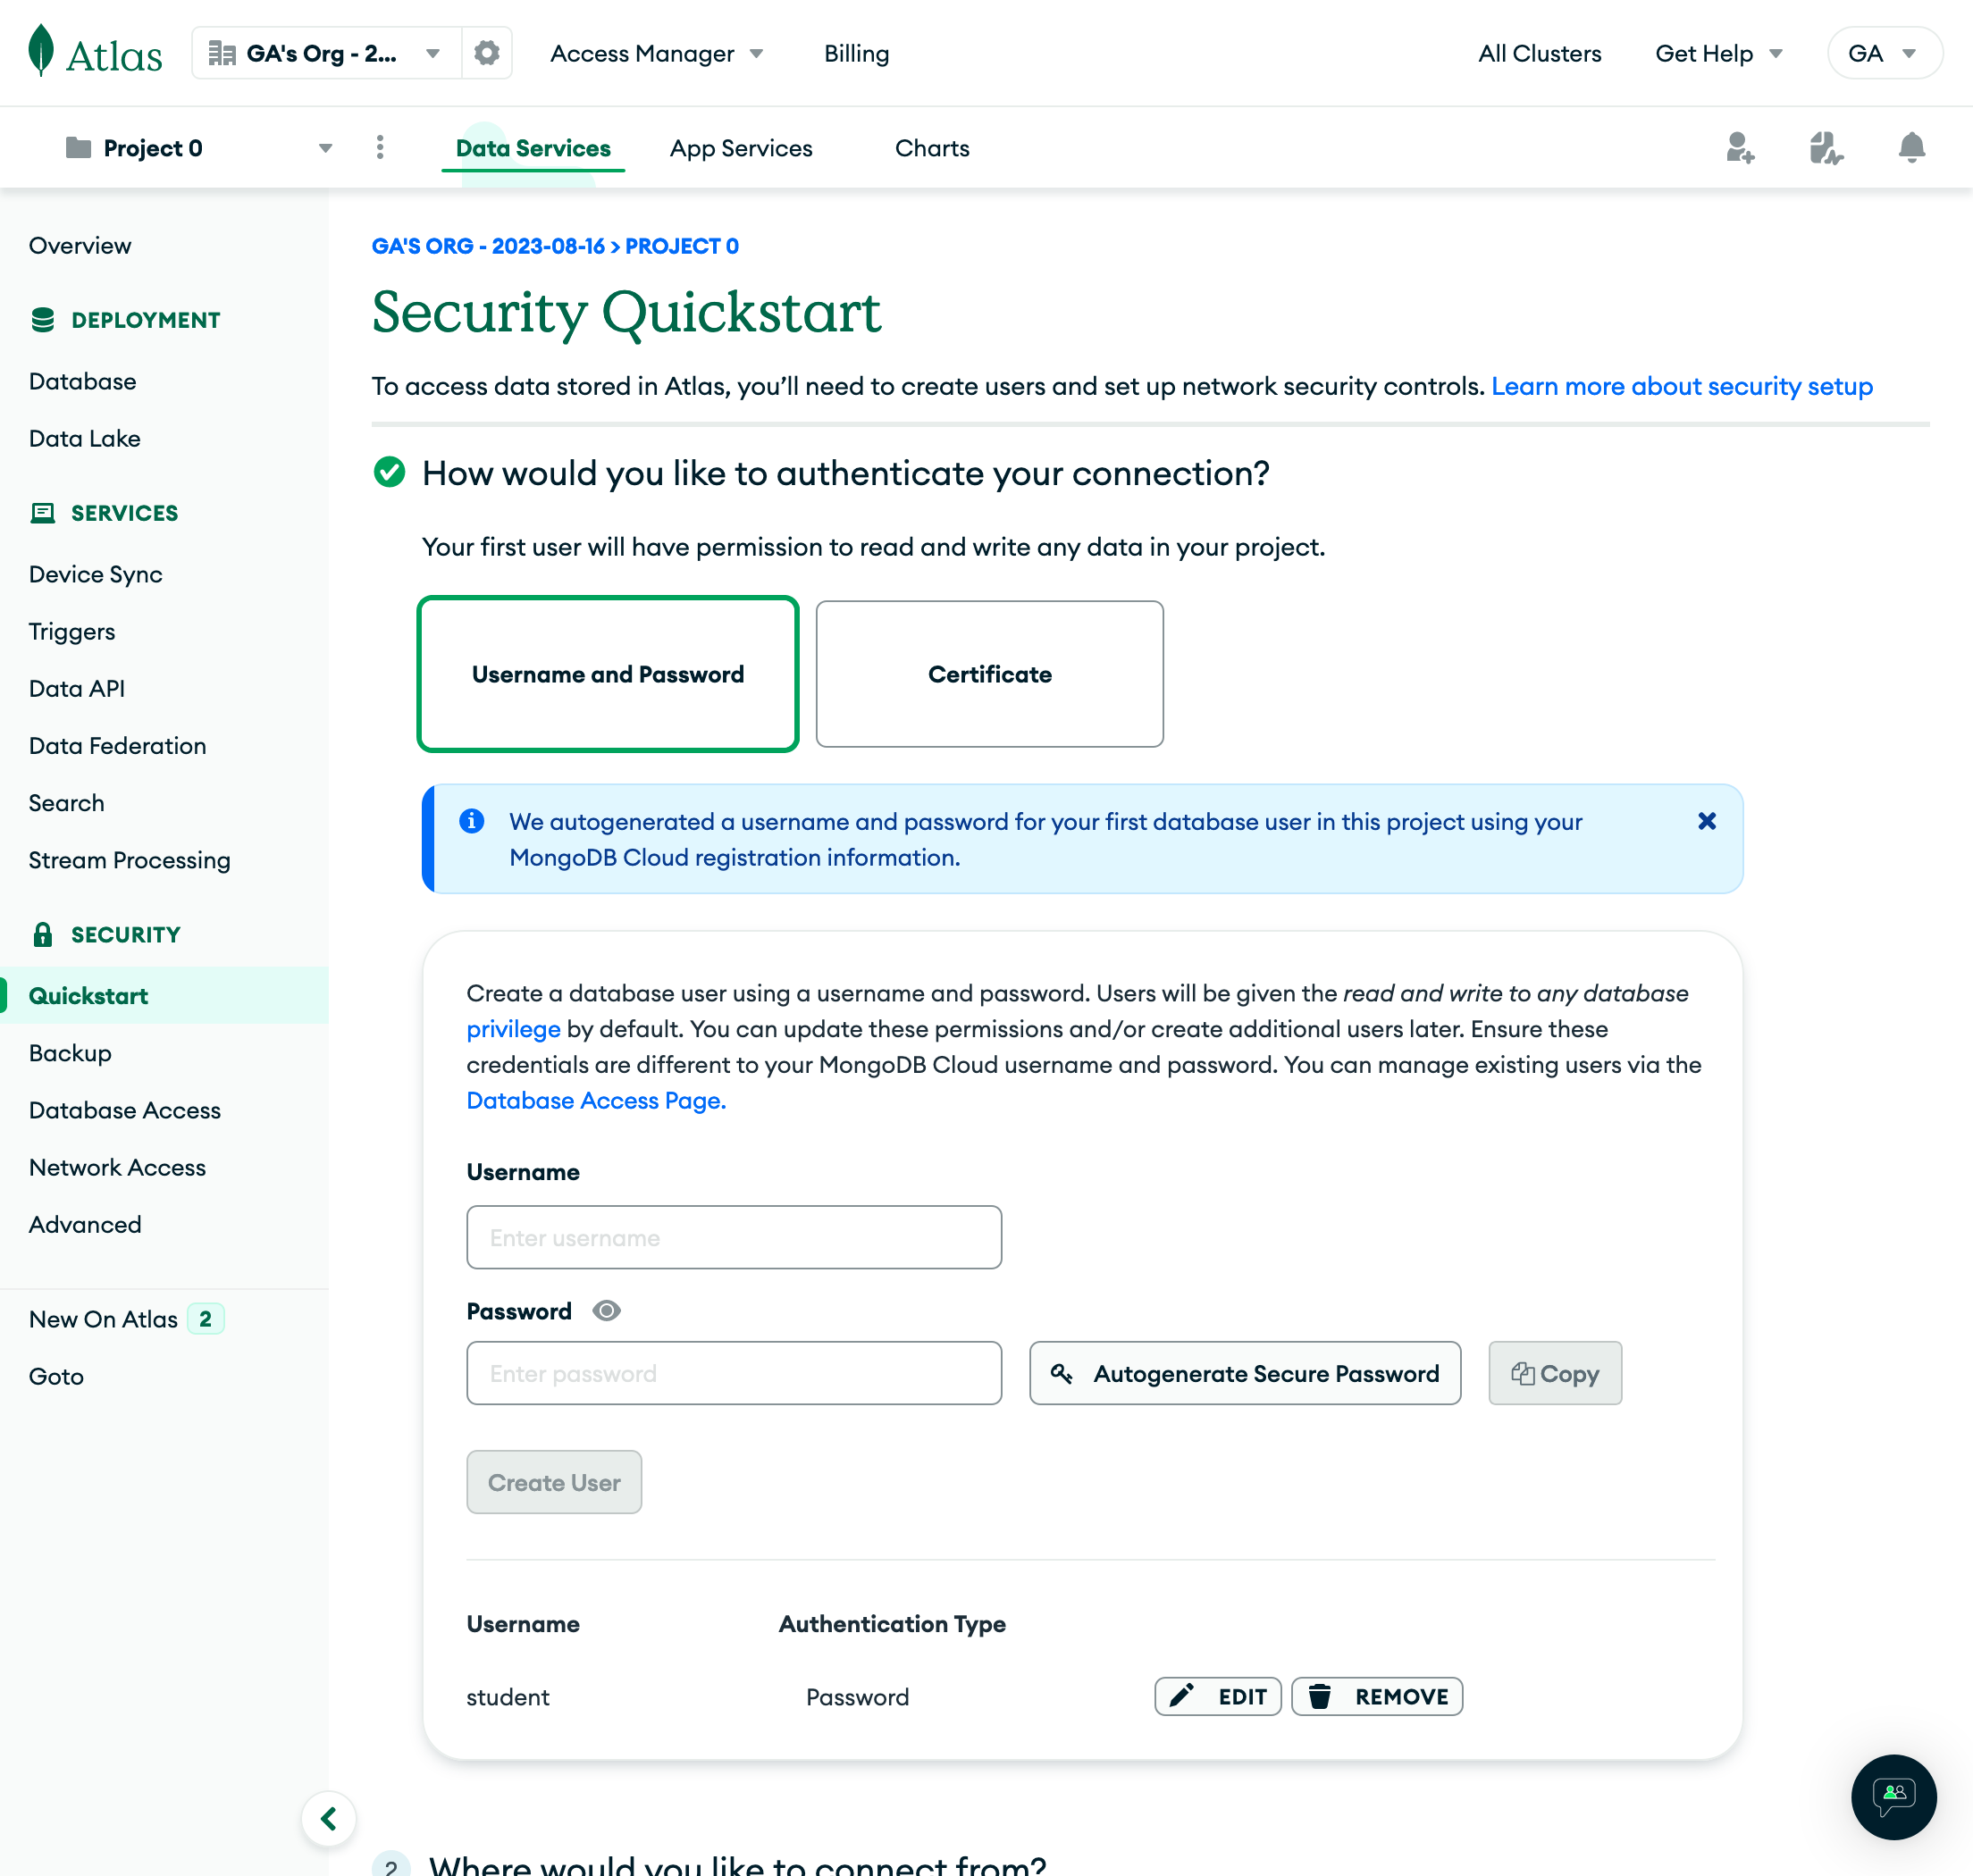
Scroll down to the second step: Where would you like to connect from?
In the IP Address field, enter the text 0.0.0.0/0 exactly as shown here. In the description, write Anywhere. Then click the Add Entry button.
IMPORTANT: This is NOT a suitable setting in a production environment and means that your database can be accessed from any device that has the correct username and password combination. We are using this setting to ensure you can easily develop and deploy to aid your educational experience. For this reason (among others), it is imperative that you not store personally identifying information (phone numbers, addresses, credit card numbers or details, insurance identification, your lucky numbers, etc. in your database.)
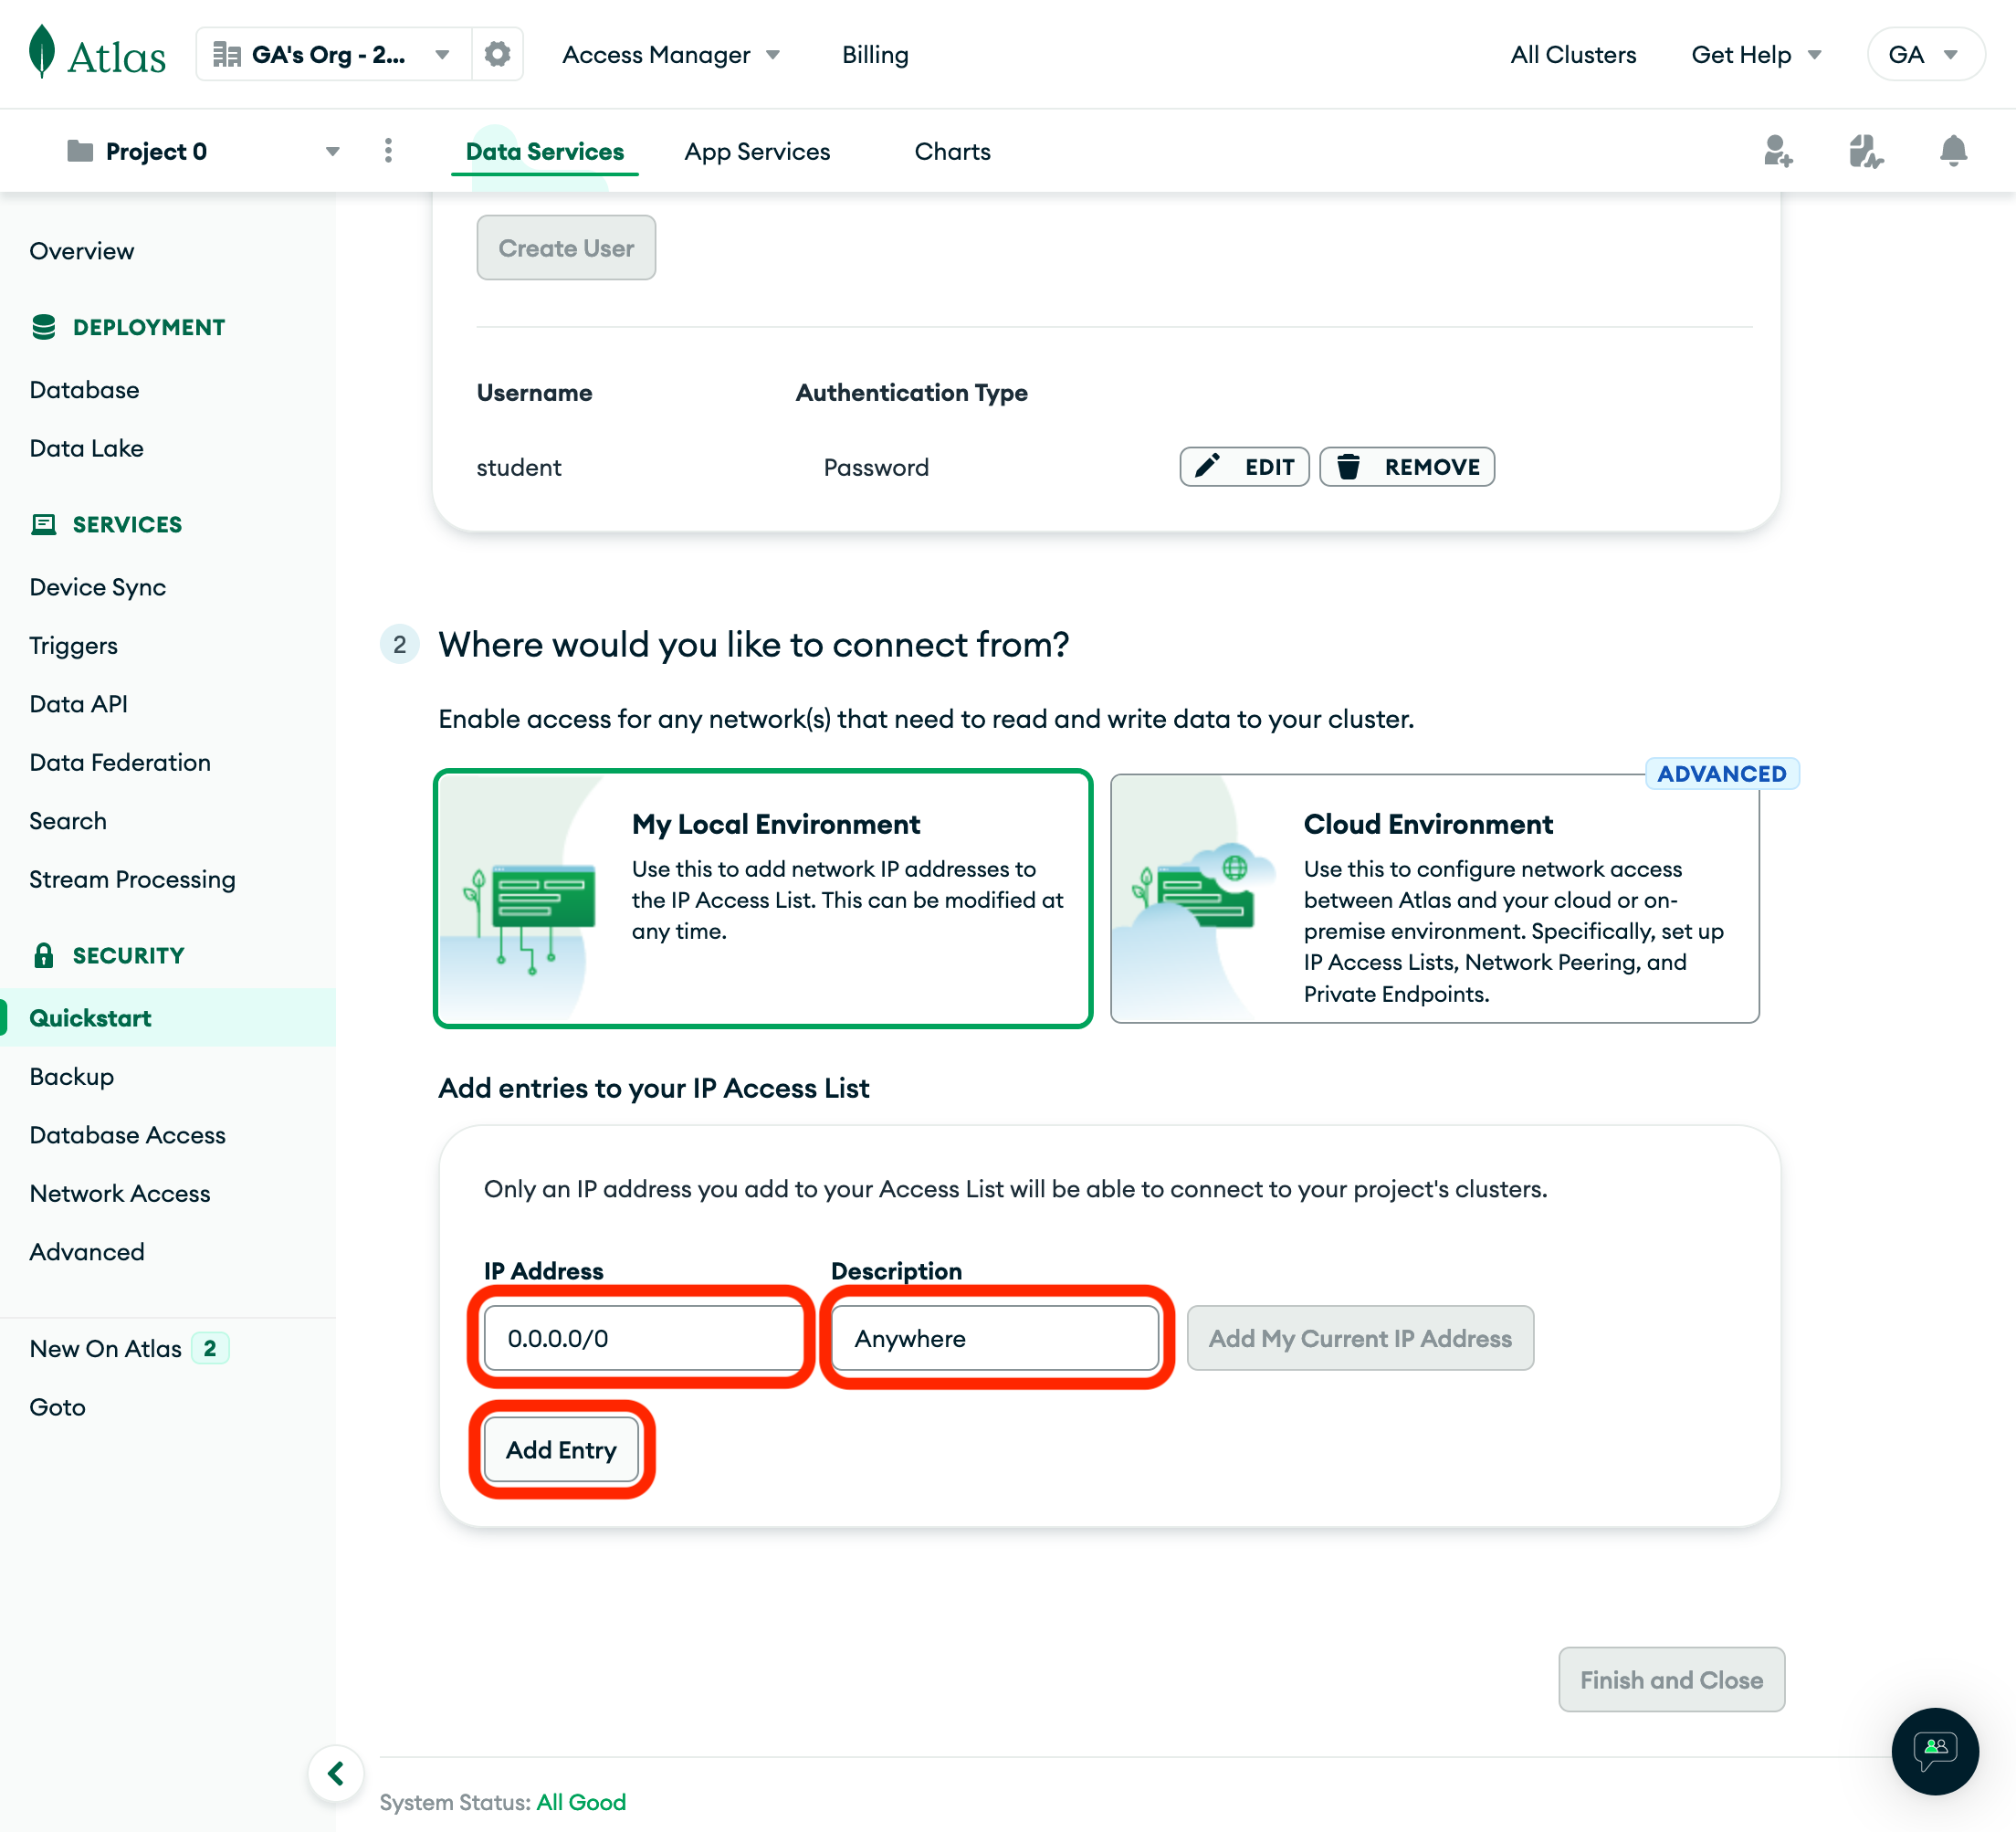
The page should look like this after this step. Select the Finish and Close button and then the Go to Overview button in the pop-up.

Obtain the Connection String
IMPORTANT: Database connection strings contain the username and password for connecting to the database. Never include the connection string in the project's source code - use a .env file instead.
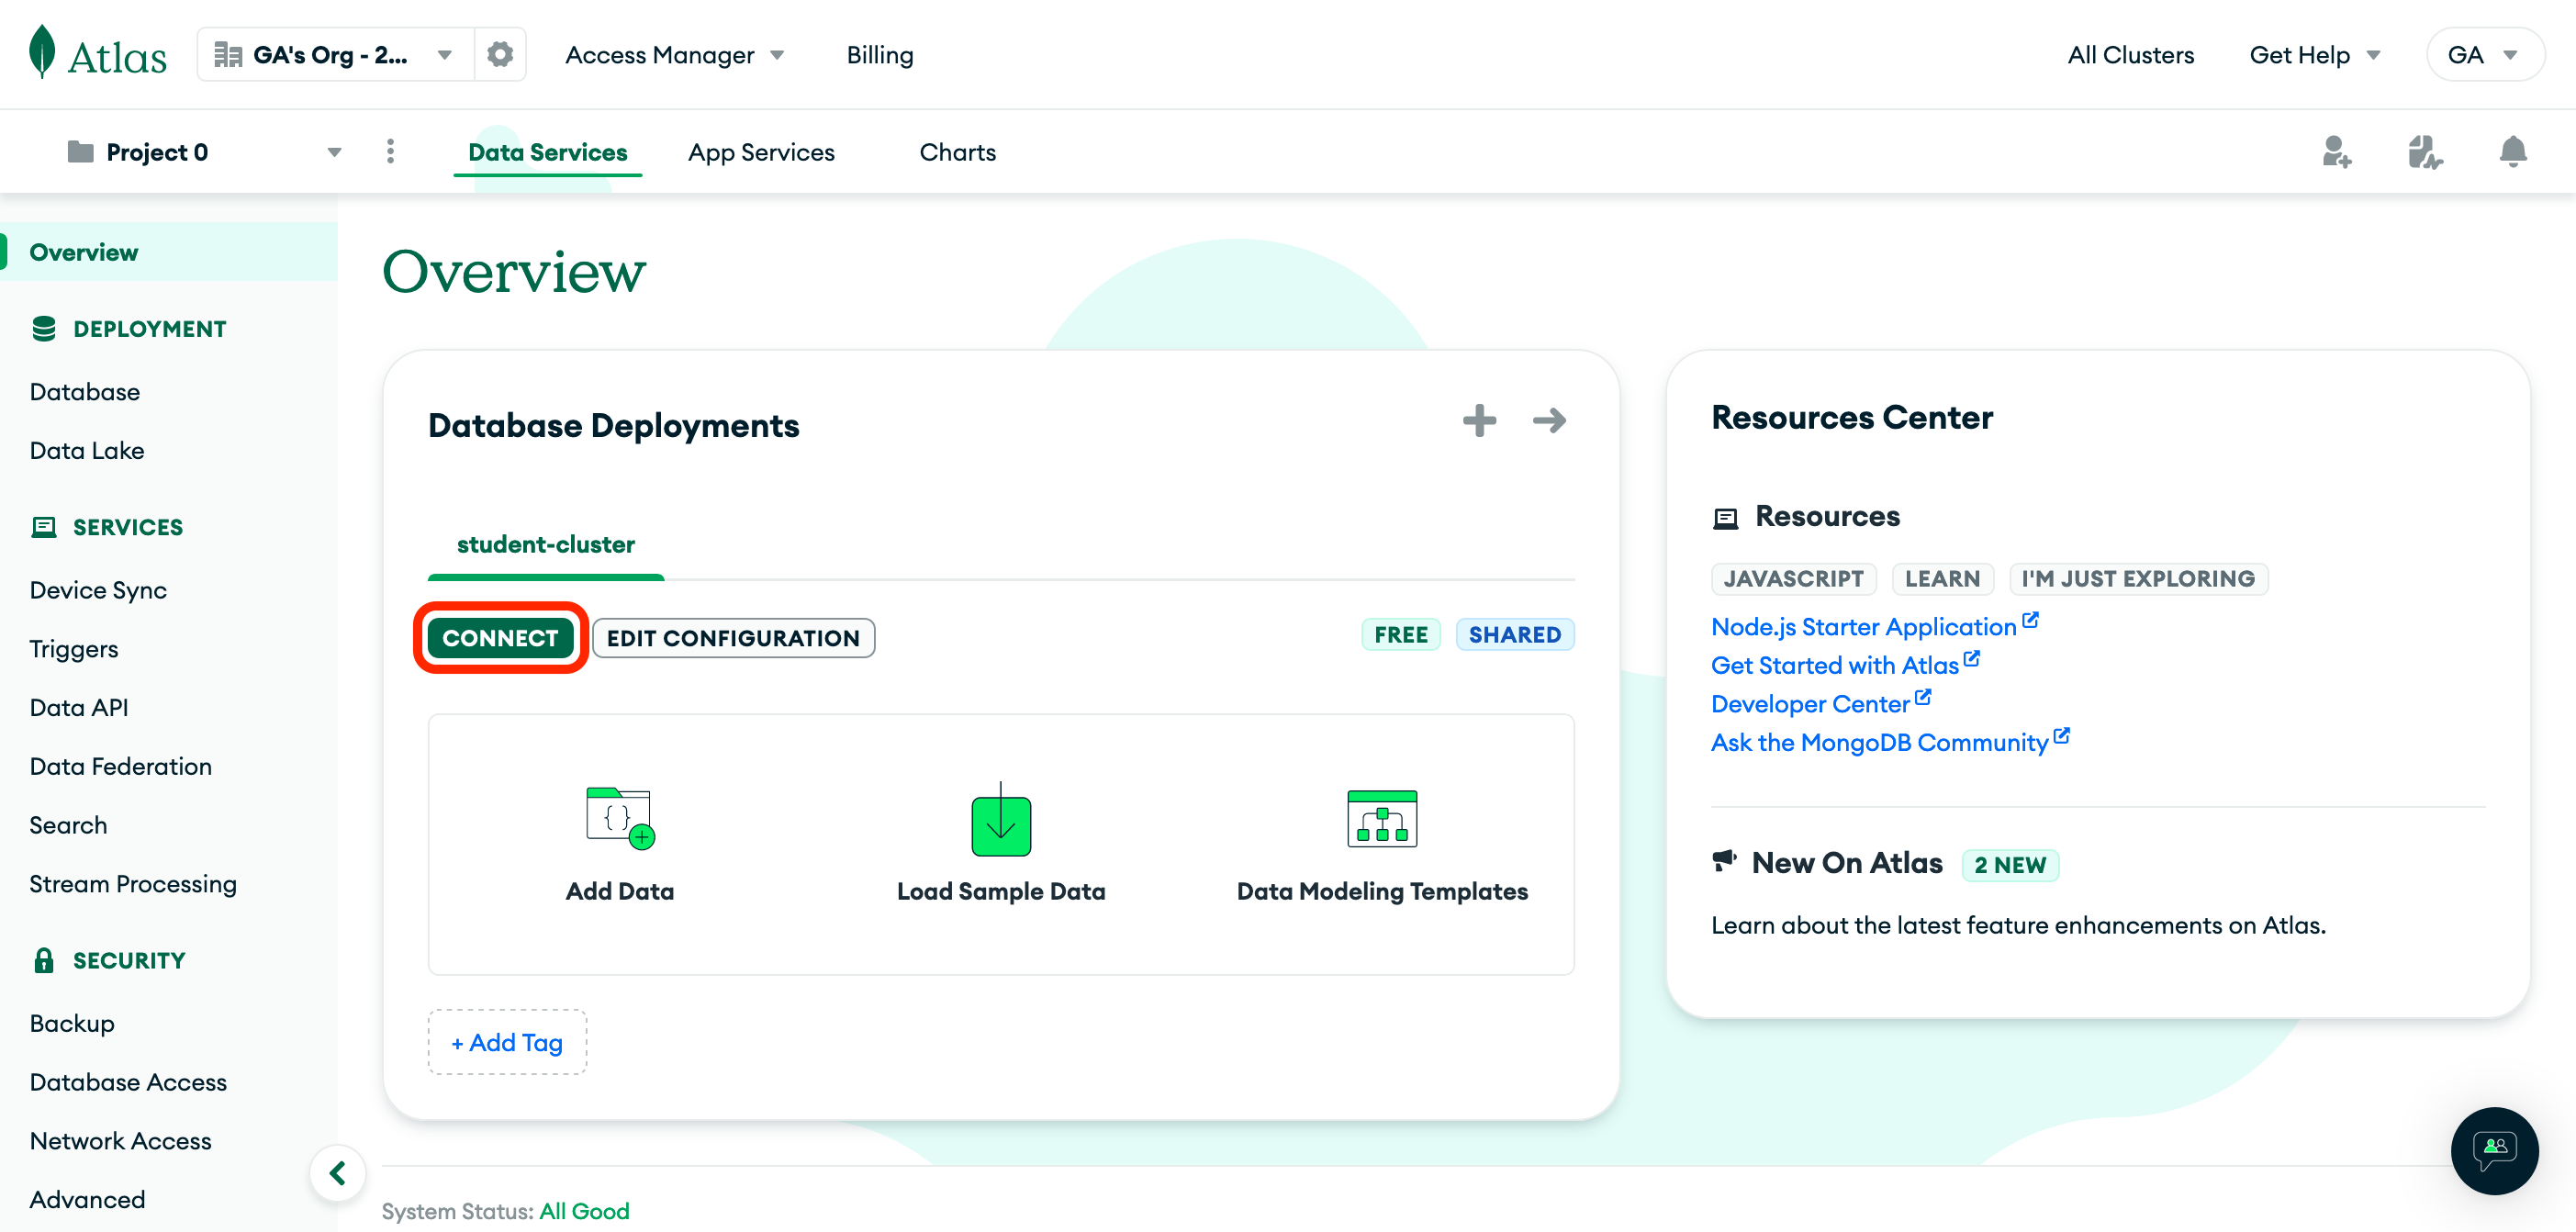
You will arrive on the Overview page. To obtain the connection string that will be added to a project's .env file, click the Connect button as shown below:
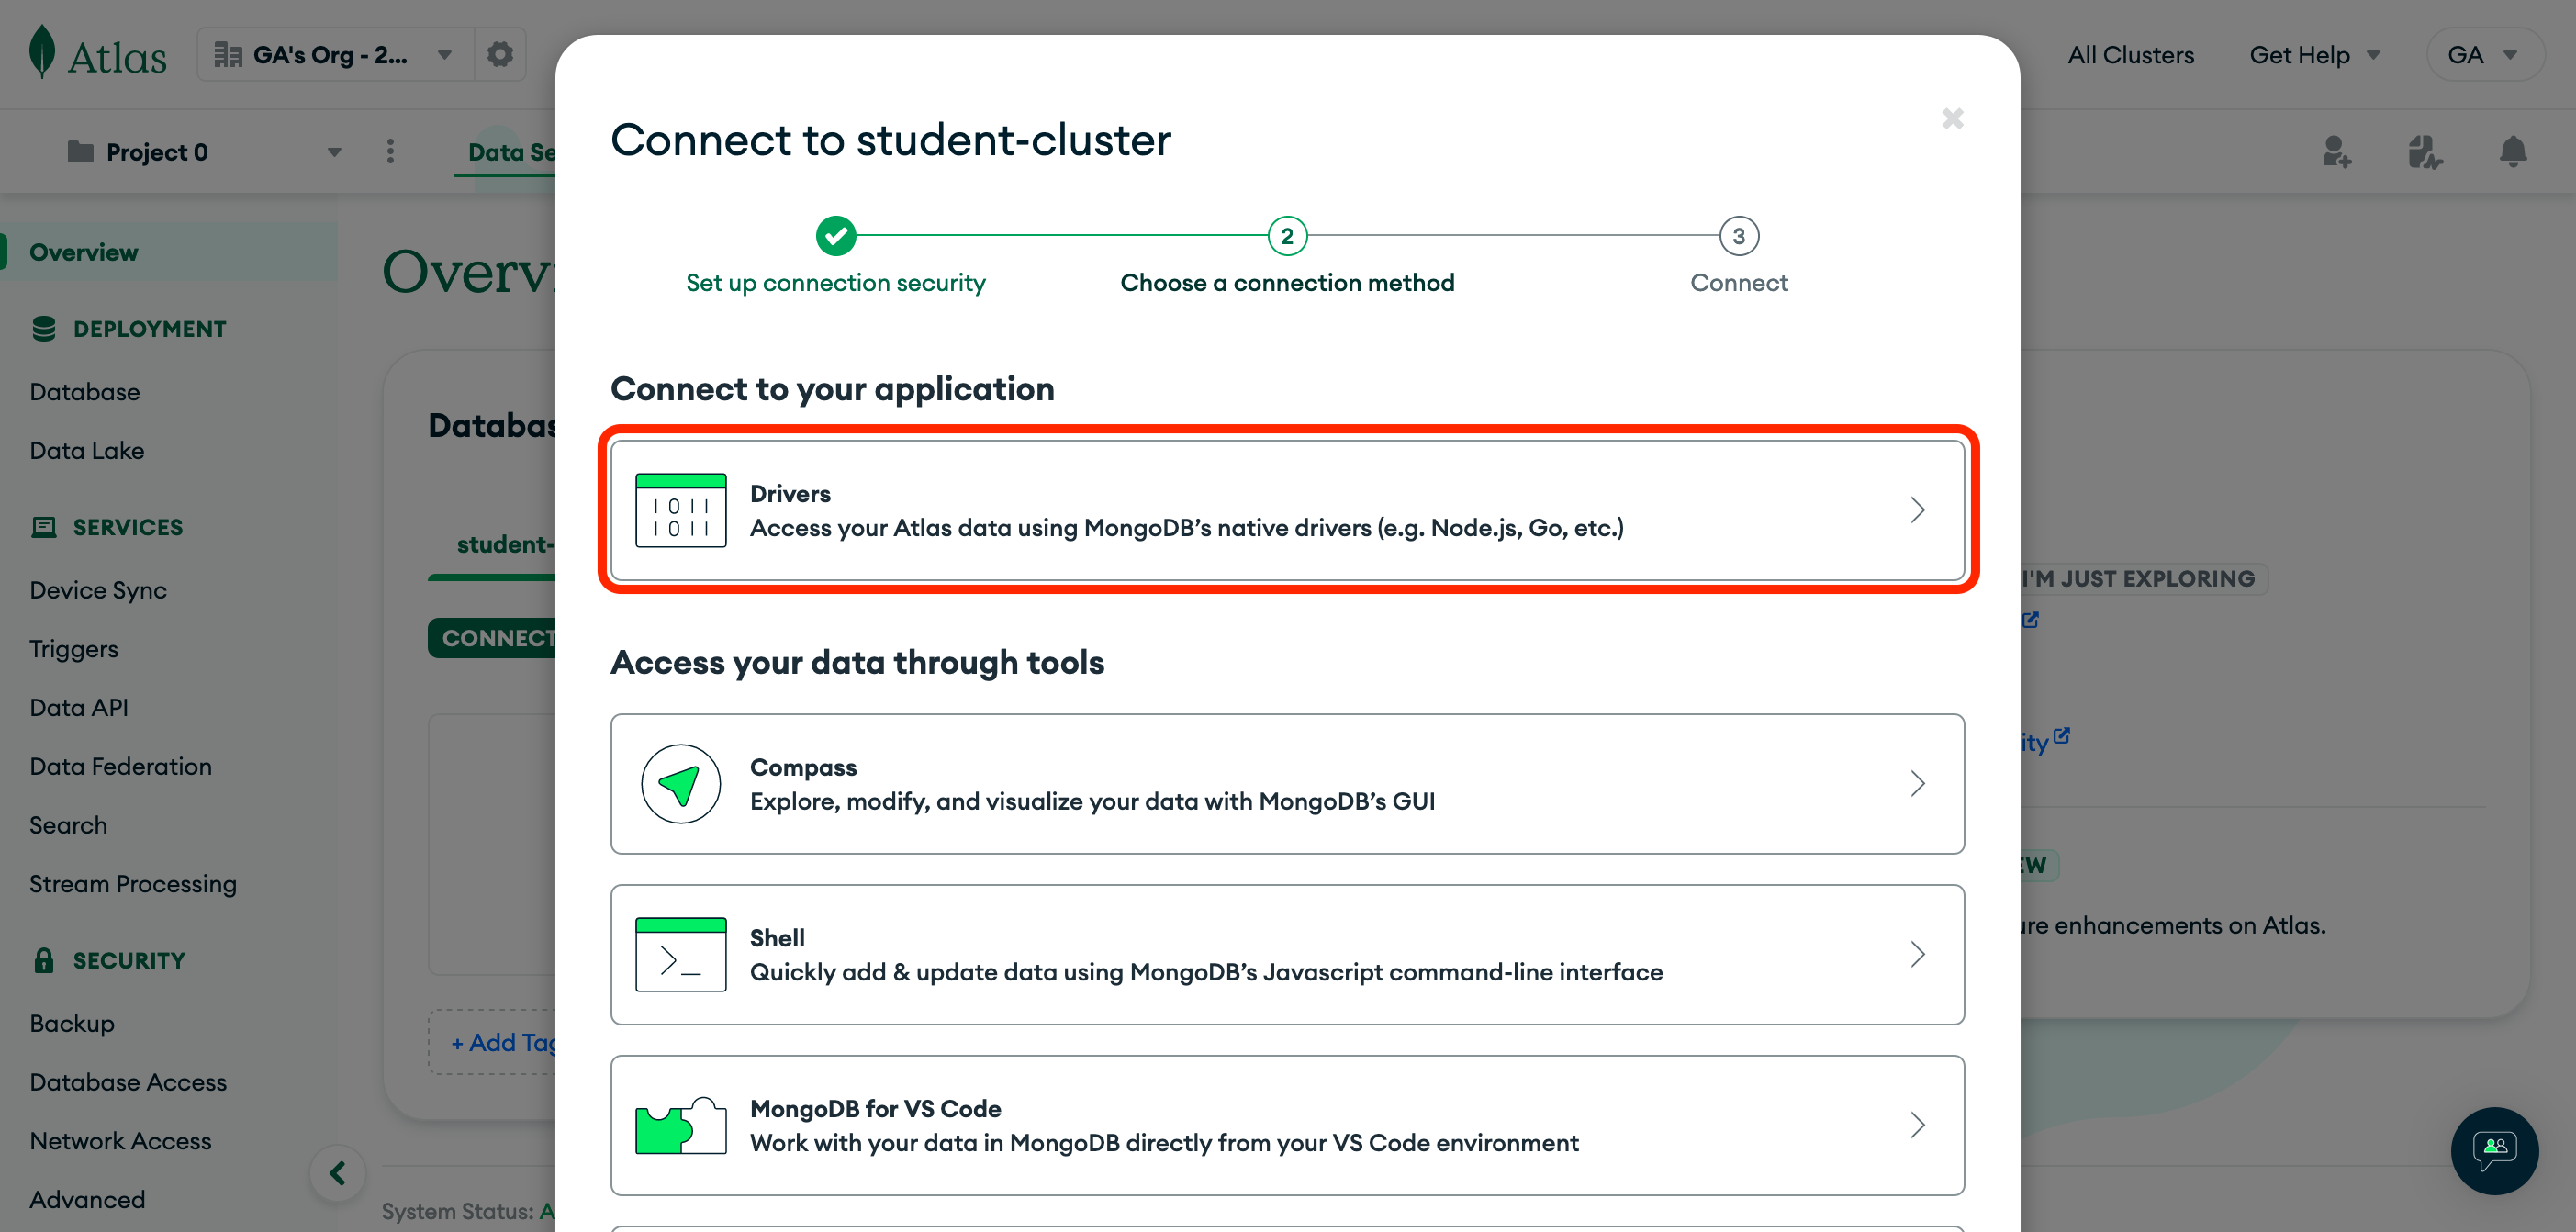
Select the only option under the Connect to your application header, Drivers:
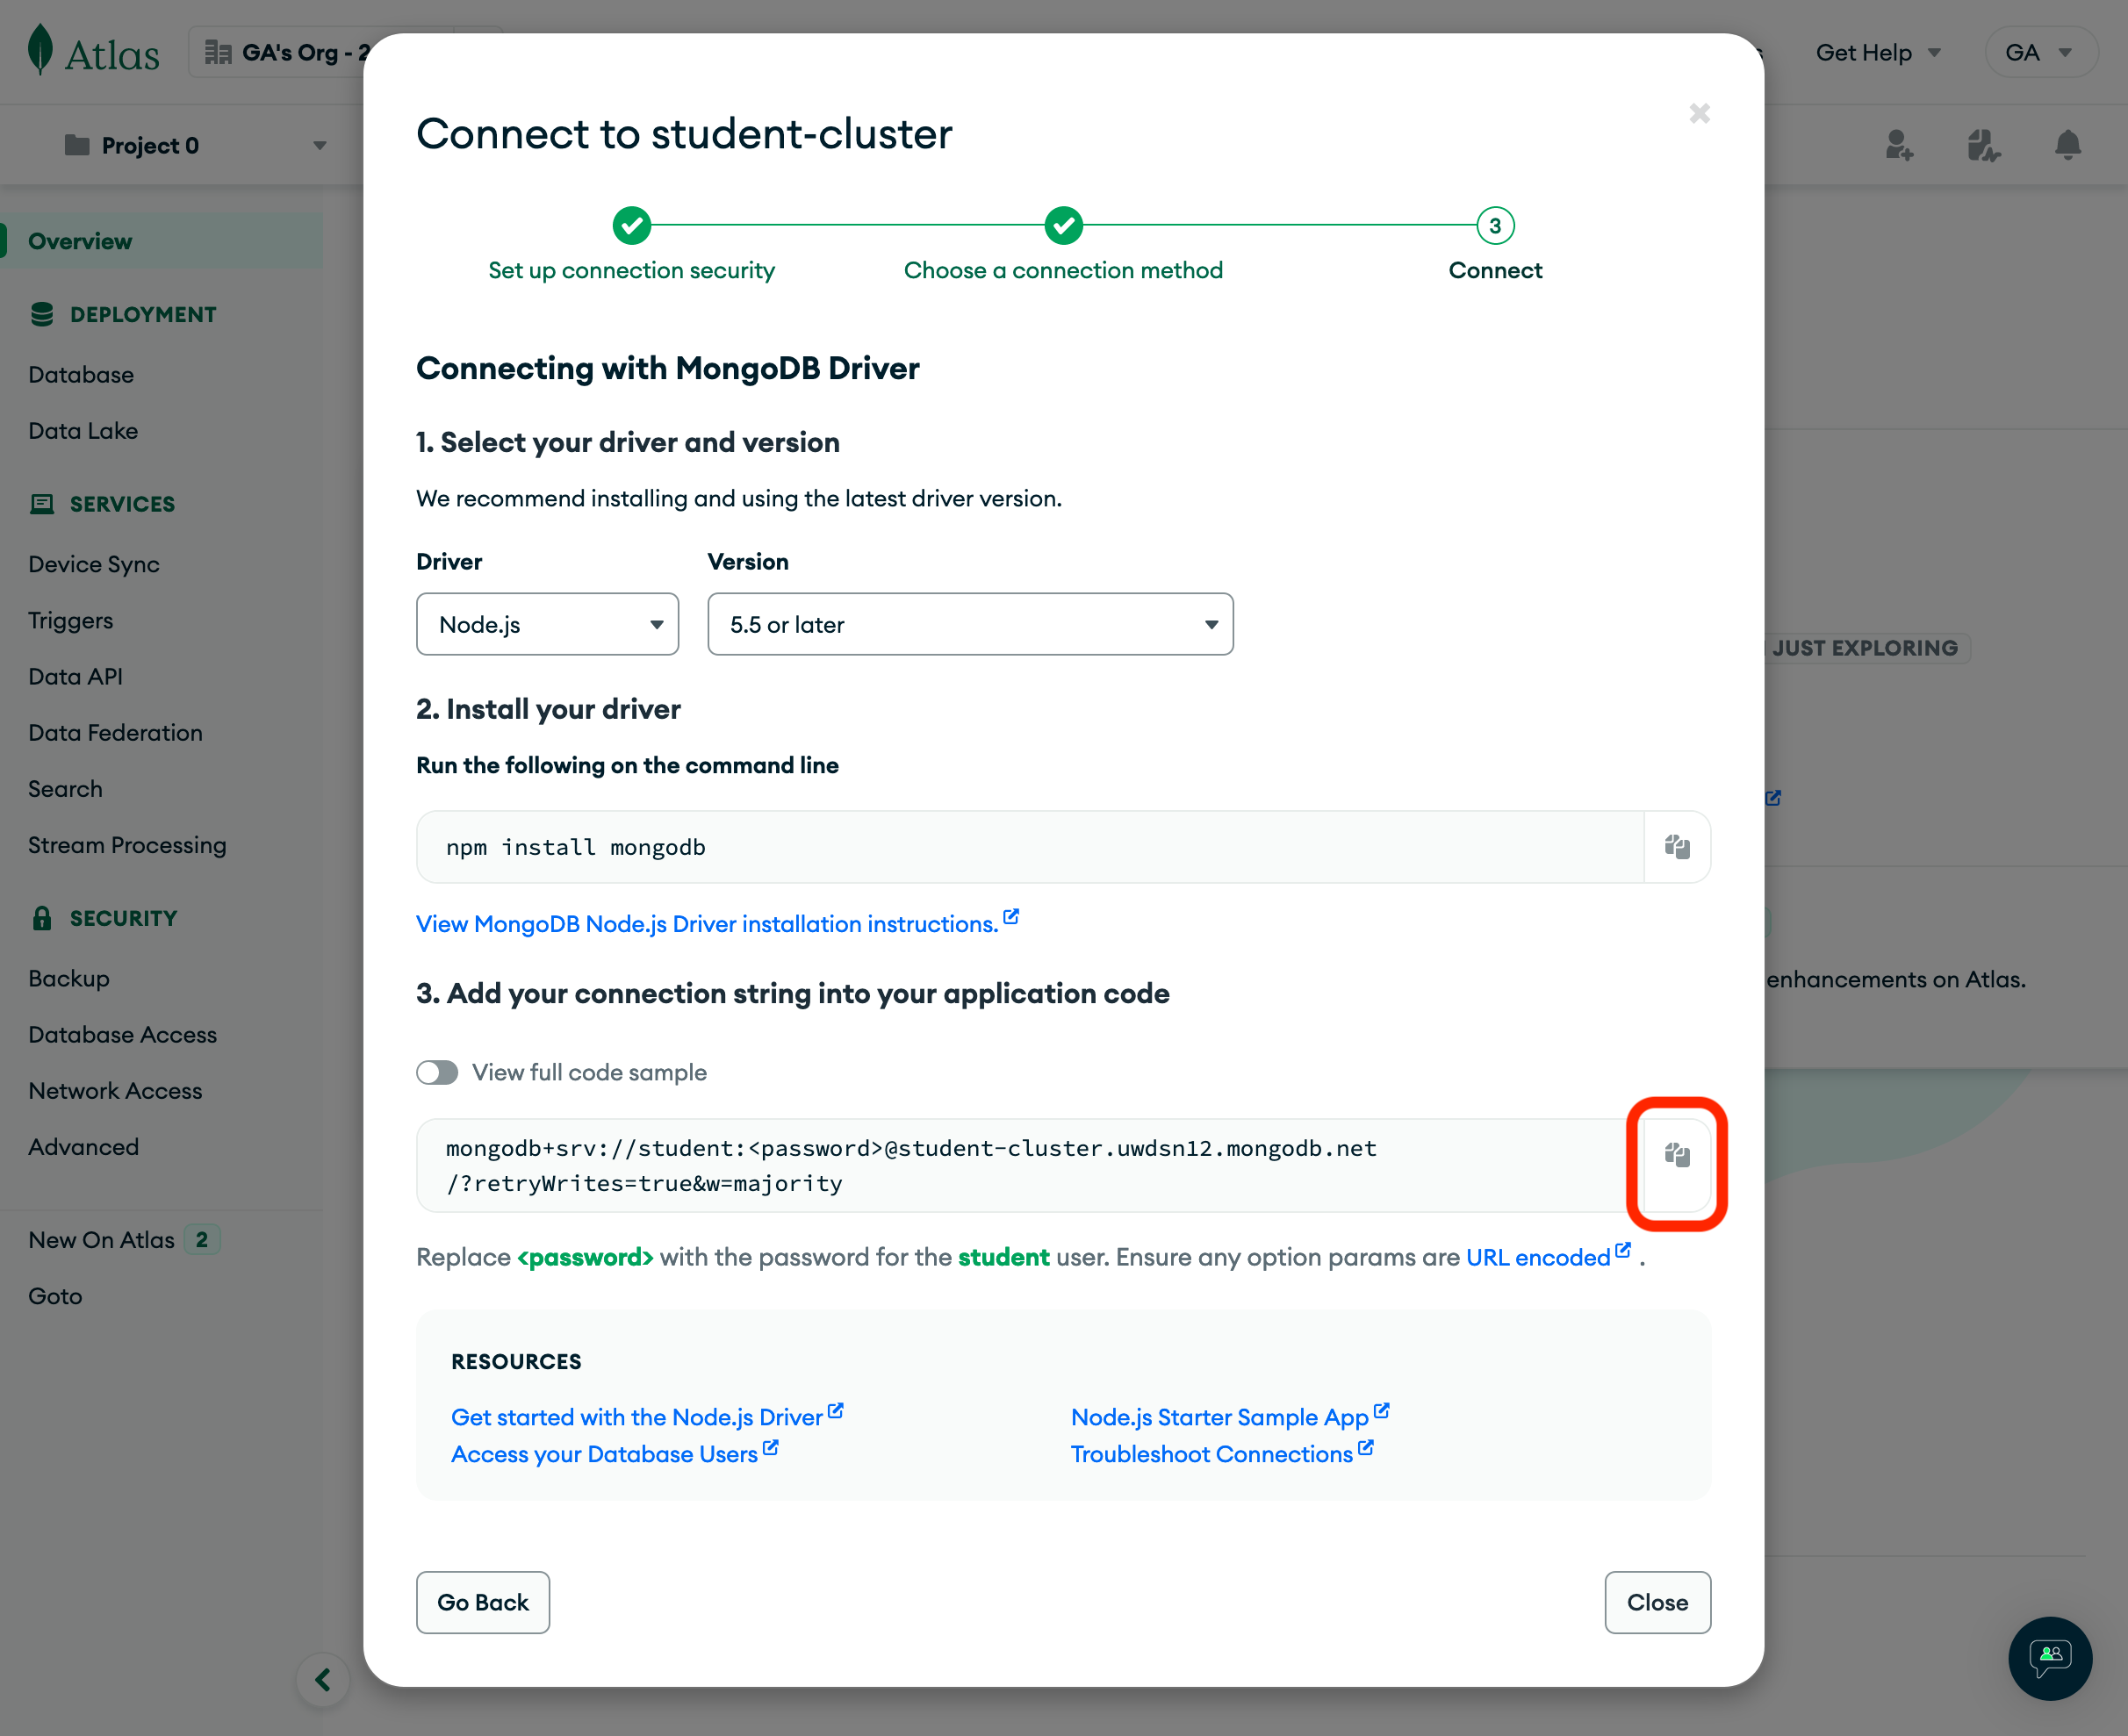
Click the copy button to add the connection string to your clipboard. You do not need to do anything else on this page.
Use the Connection String in Your App
Please do not attempt to use any of the connection strings below; they will not function in your applications.
You're almost done, but you MUST update the connection string with a few changes:
-
Replace
<password>(including the<and the>) with the password of the database user you created earlier.For example, using the password
my2Tacosalong with the connection string above as an example, the connection string would look like this after making this change:mongodb+srv://student:my2Tacos@student-cluster.uwdsn12.mongodb.net/?retryWrites=true&w=majority -
IMPORTANT: The connection string does not include a database name by default. You'll add an appropriate database name between the
/?part of the connection string for each project. For example, if you have a project namedmongoose-movies, you could give the database the same name:mongodb+srv://student:my2Tacos@student-cluster.uwdsn12.mongodb.net/mongoose-movies?retryWrites=true&w=majority
You're good to go!
You can now paste the connection string in an application's .env file, assigning it to a DATABASE_URL environment variable. As an example:
DATABASE_URL=mongodb+srv://student:<password>@student-cluster.uwdsn12.mongodb.net/?retryWrites=true&w=majority
🎉 Save the copied database connection string in a safe place for future reference! You will be using it in several projects.
For future projects, continue to use the same connection string - just be sure to change the database name part of the connection string, as mentioned above. For example, if you were to build a flights app, you might have a connection string that looks like this:
mongodb+srv://student:my2Tacos@student-cluster.uwdsn12.mongodb.net/flights?retryWrites=true&w=majorityAnd if you were to build a tacos app, you might have a connection string that looks like:
mongodb+srv://student:my2Tacos@student-cluster.uwdsn12.mongodb.net/tacos?retryWrites=true&w=majorityAll that changes is the text between the
/and the?towards the end of the connection string!
Viewing & Editing Data
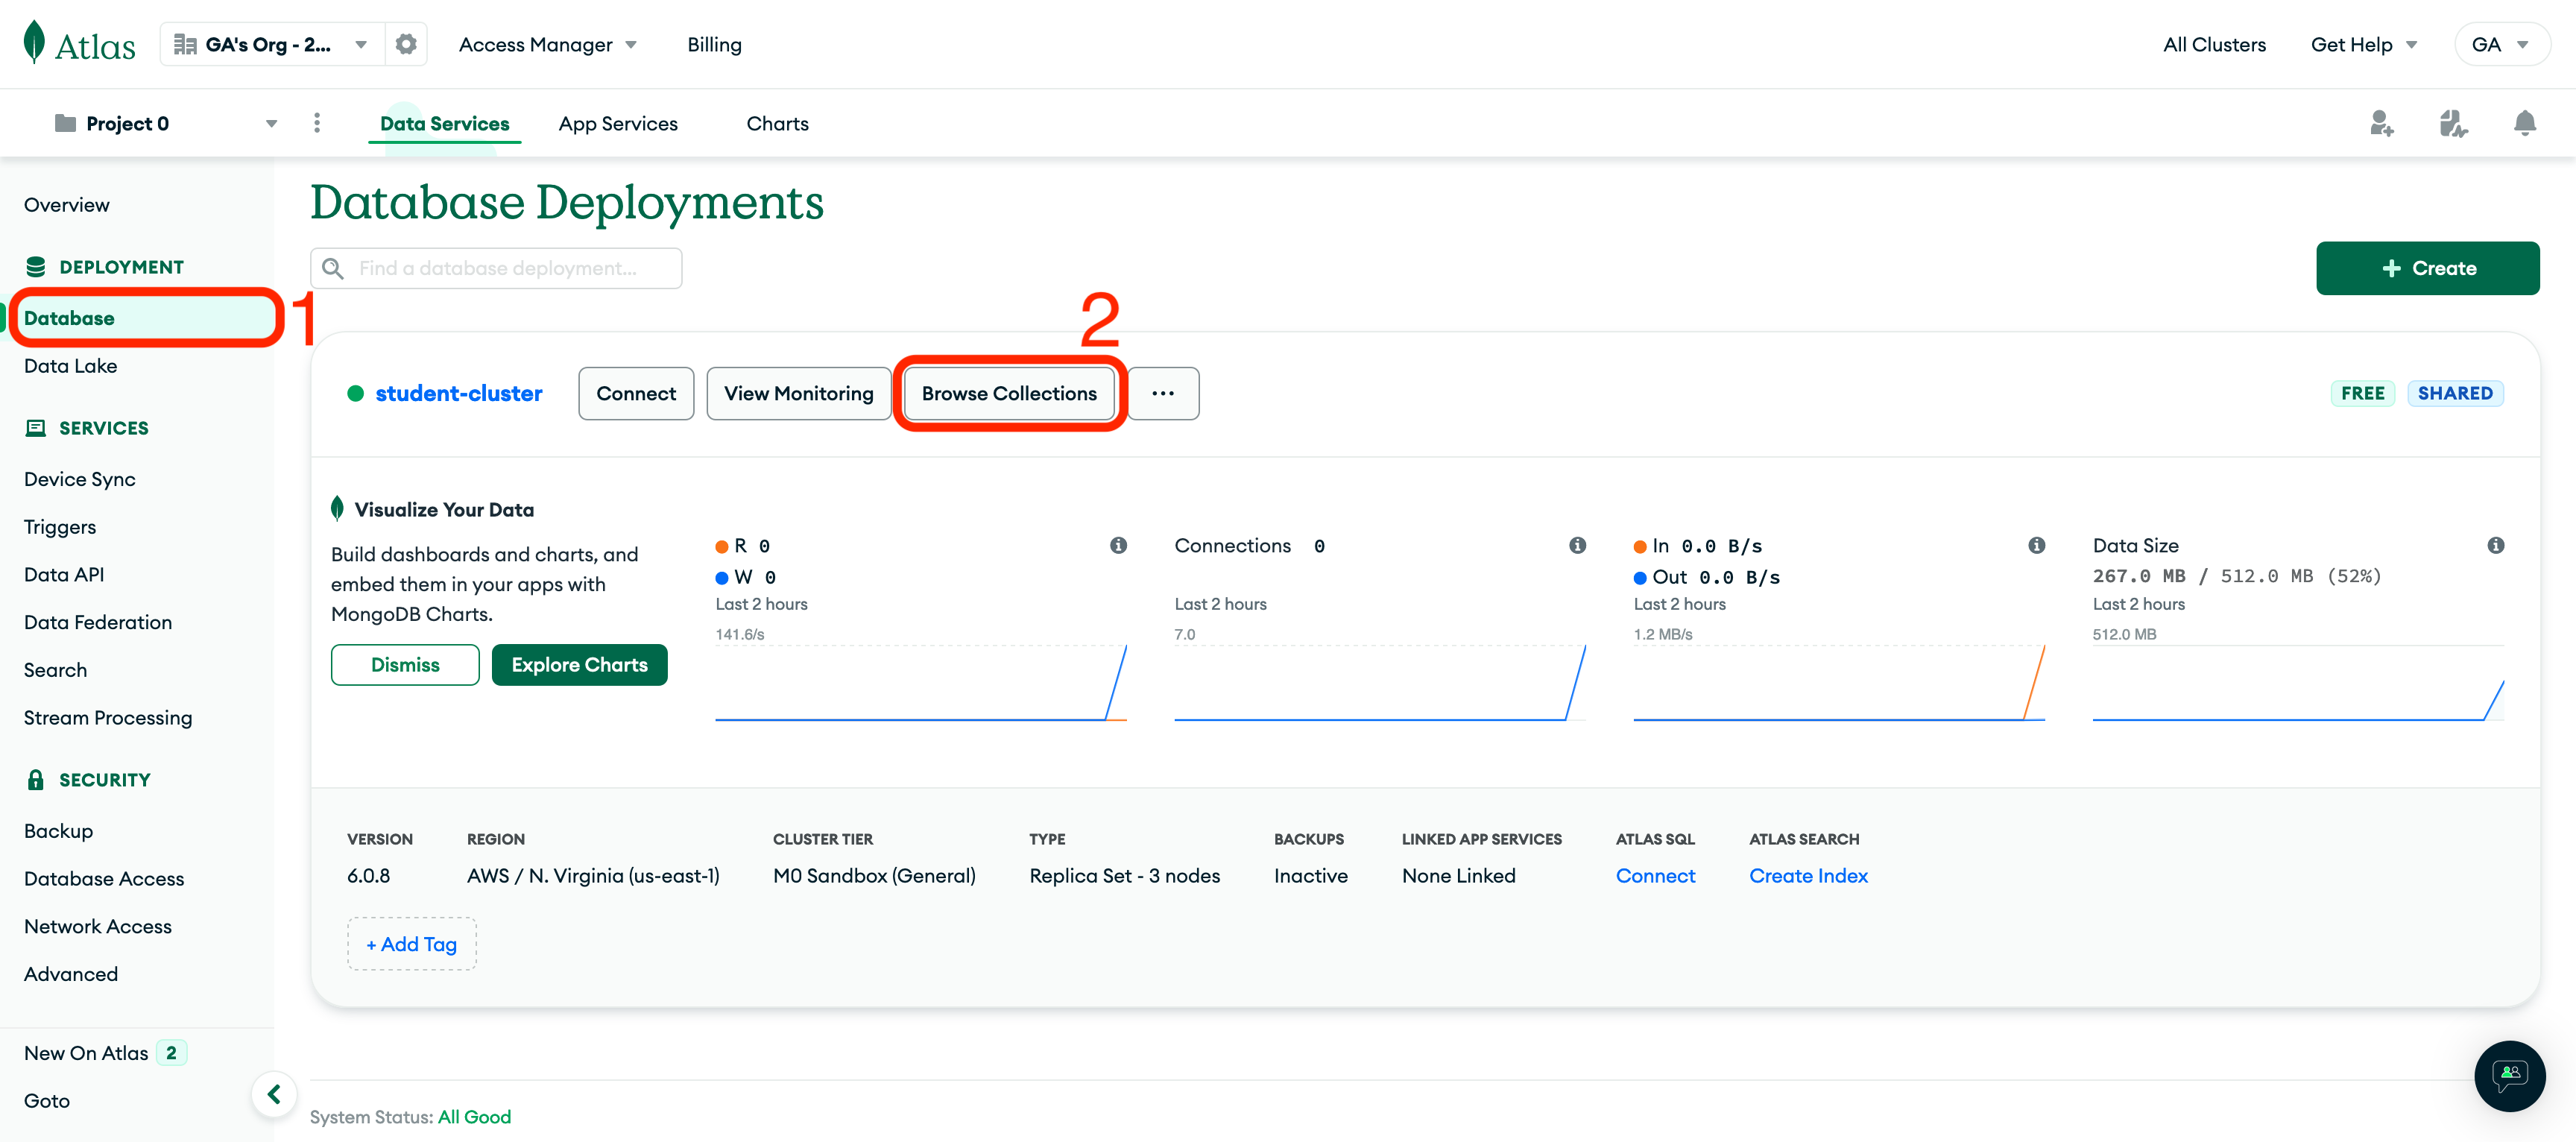
You can use Atlas to view and edit data by clicking on the Browse Collections button on the Database Deployments page, as shown below.
MongoDB also maintains an application called Compass that lets you browse your data on Atlas with just your connection string. You can download Compass here.
Test Drive in the Mongo Shell
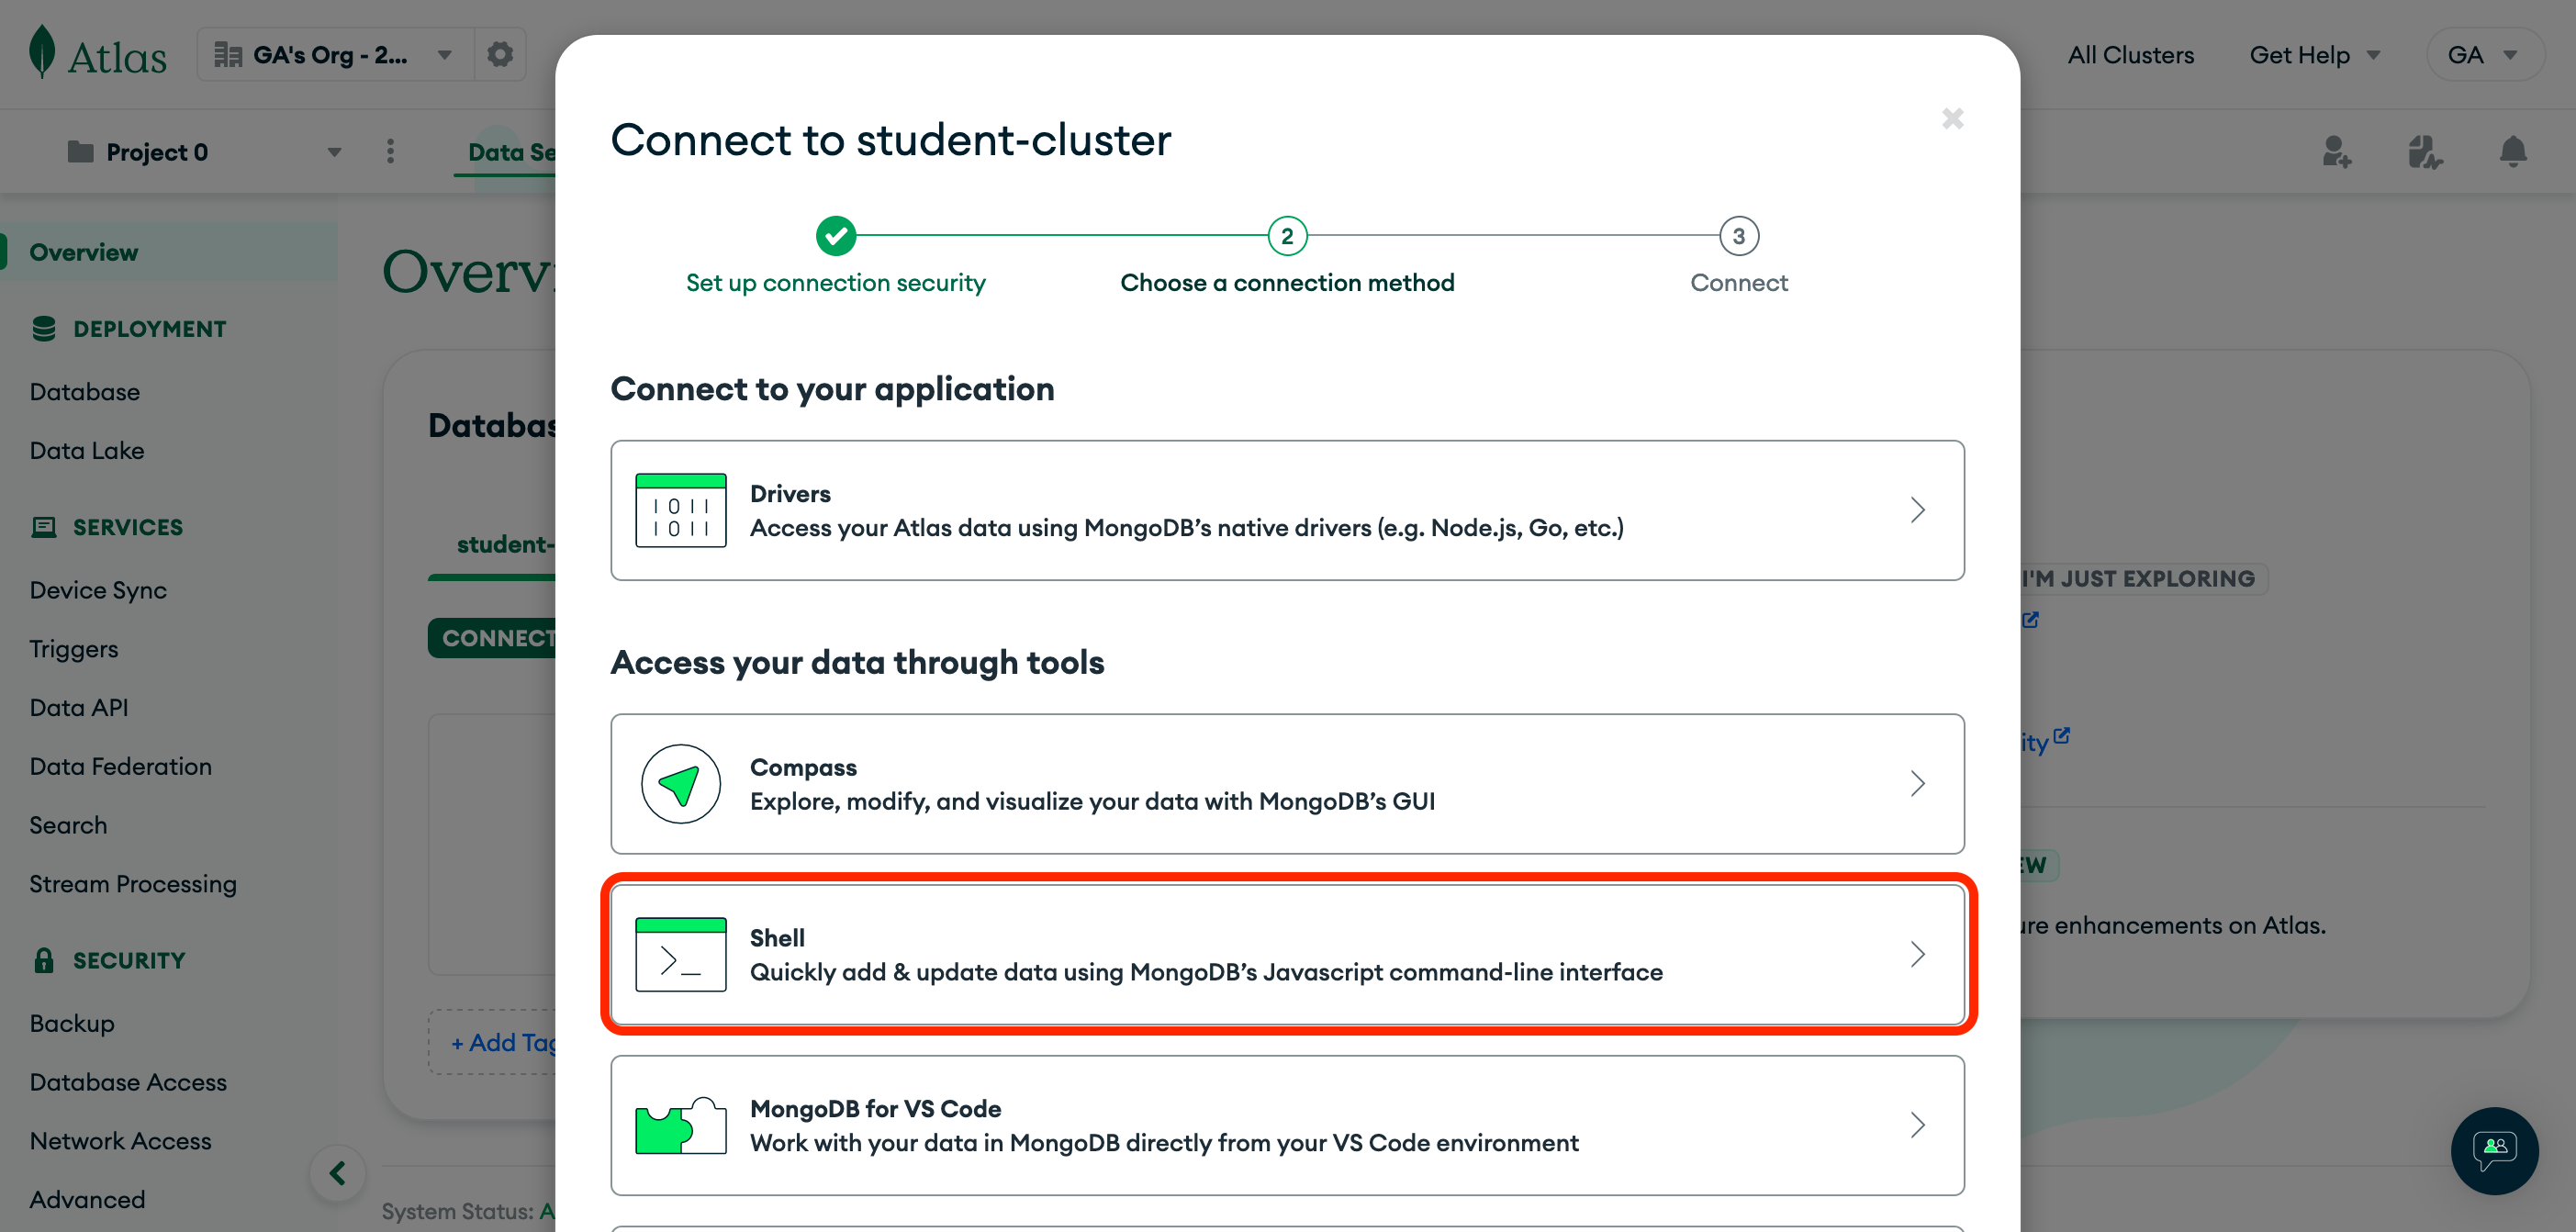
Click the Connect button again on the Overview page, and this time select Shell under the Access your data through tools header:
Although Atlas may show how to permanently install mongosh (MongoDB's Shell) for your operating system, it is unnecessary.
Instead, we can temporarily install and run mongosh by copying and pasting the command shown in Atlas into Terminal.

❗️ Before pressing enter, add npx to the front of the command so that the command looks something like this:
npx mongosh "mongodb+srv://student-cluster.uwdsn12.mongodb.net/" --apiVersion 1 --username yourusername
If prompted to install, be sure to answer with y.
You will be prompted to enter your database user's password.
Congrats, you are now ready to test the database in the Intro to MongoDB lesson!